DIY garden arbor sets the stage for a beautiful and functional addition to your outdoor space. Arbors, whether freestanding or attached, offer a charming and versatile way to enhance your garden’s aesthetics and provide a welcoming ambiance.
This comprehensive guide will walk you through the process of building your own DIY garden arbor, from planning and design to construction and finishing touches. Whether you’re a seasoned DIYer or a beginner, this step-by-step approach will empower you to create a stunning arbor that complements your garden’s unique character.
Choosing Materials and Tools

The materials and tools you choose for your DIY garden arbor will significantly impact its durability, aesthetics, and overall success. Selecting high-quality materials and having the right tools on hand will make the construction process smoother and ensure a long-lasting structure.
Choosing Materials
The type of material you select for your arbor will depend on your budget, desired aesthetic, and the climate in your area. Common materials include:
- Wood: Wood is a classic and versatile choice for arbors, offering a natural look and warm feel. It’s readily available in various types, including cedar, redwood, and pressure-treated lumber, each with unique properties. Cedar and redwood are naturally resistant to rot and insects, making them ideal for outdoor applications. Pressure-treated lumber is treated with chemicals to prevent rot and decay, making it suitable for areas with high moisture levels.
- Metal: Metal arbors, often made from wrought iron or steel, provide a sturdy and elegant option. They are durable and weather-resistant, making them a good choice for areas with harsh climates. Metal arbors can be painted or powder-coated to match your garden’s style.
- Composite: Composite materials, such as recycled plastic and wood fibers, offer a low-maintenance alternative to traditional wood. They are resistant to rot, insects, and fading, making them a good choice for busy gardeners. Composite arbors are typically available in a variety of colors and textures.
Gathering Tools
Having the right tools will ensure a smooth and efficient construction process. Here’s a list of essential tools for building a garden arbor:
- Saw: A circular saw or a handsaw will be needed to cut lumber to size. A miter saw is helpful for precise cuts, especially for angles.
- Drill: A cordless drill with a variety of drill bits is essential for drilling pilot holes and attaching hardware.
- Hammer: A hammer is needed for driving nails and securing components.
- Level: A level is crucial for ensuring that your arbor is straight and plumb.
- Measuring Tape: A measuring tape is essential for accurate measurements and cutting lumber.
- Safety Glasses: Always wear safety glasses when working with power tools and cutting lumber.
- Work Gloves: Work gloves will protect your hands while handling tools and materials.
Tips for Selecting Materials
When choosing materials for your arbor, consider the following tips:
- Durability: Choose materials that are resistant to rot, insects, and weather damage. For wood, cedar and redwood are excellent choices. Metal and composite materials are also durable options.
- Aesthetics: Select materials that complement your garden’s style. Wood offers a natural look, while metal and composite materials can provide a more modern or contemporary feel.
- Maintenance: Consider the level of maintenance you’re willing to commit to. Wood arbors require regular staining or painting to protect them from the elements, while metal and composite materials require less maintenance.
- Budget: Set a budget for your arbor project and choose materials that fit within your price range. Wood is generally the most affordable option, followed by composite materials and then metal.
Step-by-Step Construction Guide

This section provides a detailed guide on constructing your DIY garden arbor, covering essential steps from preparing the base to finishing touches. The guide includes visual representations to aid in understanding the process.
Preparing the Base
The foundation of your arbor is crucial for stability and longevity.
- Determine the Location: Choose a sunny spot in your garden, ensuring the arbor is positioned on level ground. Consider the size of the arbor and its proximity to other plants or structures.
- Mark the Area: Use stakes and string to Artikel the footprint of the arbor. This will ensure that the base is properly aligned and positioned.
- Excavate the Base: Dig a shallow trench around the perimeter of the marked area, about 6-8 inches deep. The depth should be sufficient to accommodate the base posts and ensure stability.
- Set the Posts: Position the base posts in the trench, ensuring they are level and plumb. Secure them with concrete mix or gravel for stability. Allow the concrete to cure completely before proceeding.
Assembling the Frame
The frame is the backbone of the arbor, providing structural support and defining its shape.
- Cut the Posts: Measure and cut the vertical posts to the desired height of the arbor. Use a saw with a fine-tooth blade for precise cuts.
- Attach the Top Rail: Position the top rail on the posts and secure it using screws or bolts. Ensure the rail is level and flush with the posts.
- Attach the Side Rails: Attach the side rails to the posts and top rail, creating the rectangular frame. Use screws or bolts, ensuring the rails are securely fastened.
- Install the Braces: Add diagonal braces for extra support and stability. Secure the braces to the frame using screws or bolts, ensuring they are positioned at a 45-degree angle for maximum strength.
Adding the Lattice
The lattice panels create a decorative element and provide a surface for climbing plants to grow.
- Cut the Lattice Panels: Measure and cut the lattice panels to fit the dimensions of the arbor frame. Use a saw with a fine-tooth blade for precise cuts.
- Attach the Lattice Panels: Secure the lattice panels to the frame using screws or bolts. Ensure the panels are flush with the frame and positioned evenly.
- Add Decorative Touches: Consider adding decorative elements to the lattice, such as wood trim or painted designs, to enhance the aesthetic appeal of the arbor.
Installing the Arbor
Once the arbor is assembled, it’s time to install it in its designated location.
- Position the Arbor: Carefully position the arbor over the prepared base, ensuring it is level and aligned with the marked area.
- Secure the Arbor: Secure the arbor to the base using screws or bolts, ensuring it is firmly attached. This will prevent the arbor from shifting or moving over time.
- Add Finishing Touches: Consider adding decorative elements to the arbor, such as a roof or hanging planters, to enhance its appearance and functionality.
Finishing Touches and Personalization
Your garden arbor is structurally complete, but now it’s time to add the finishing touches that will truly make it your own. Adding decorative elements, choosing the right paint or stain, and incorporating climbing plants can transform your arbor from a basic structure to a stunning focal point in your garden.
Decorative Elements, Diy garden arbor
Decorative elements can elevate the aesthetic appeal of your arbor and create a unique look. Here are some ideas:
- Trellis Panels: Add intricately designed trellis panels to the sides or back of the arbor, allowing for climbing plants to cascade beautifully.
- Latticework: Incorporate latticework for a classic and elegant touch. You can create custom designs or purchase pre-made panels.
- Finials: Decorative finials can be placed on top of the posts for a touch of grandeur. Choose finials that complement the style of your arbor.
- Architectural Details: Consider adding decorative molding, brackets, or other architectural details to enhance the visual appeal of the arbor.
Choosing Paint or Stain
- Paint: Painting your arbor allows for a wide range of colors and finishes. Choose a paint that is specifically designed for outdoor use and provides UV protection to prevent fading.
- Stain: Staining your arbor will enhance the natural beauty of the wood while providing protection from the elements. Select a stain that matches the overall style of your garden.
Incorporating Climbing Plants
- Vines: Climbing vines, such as clematis, honeysuckle, or wisteria, will create a lush and romantic ambiance around your arbor. Choose varieties that are suitable for your climate and soil conditions.
- Roses: Climbing roses are a classic choice for arbors, adding fragrance and vibrant color. Select varieties that are disease-resistant and thrive in your region.
- Other Climbing Plants: Consider incorporating other climbing plants, such as ivy, morning glories, or jasmine, to create a diverse and visually appealing display.
Creating a Unique and Personalized Arbor
To create a truly unique arbor, consider incorporating personal touches that reflect your style and preferences.
- Custom Designs: If you’re comfortable with woodworking, you can create custom designs for your arbor, such as intricate carvings or personalized inscriptions.
- Family Heirlooms: Incorporate family heirlooms, such as antique hardware or salvaged wood, into your arbor design to add a touch of history and sentimental value.
- Theme: Choose a theme for your arbor, such as a rustic, romantic, or whimsical theme, and select decorative elements and plants that align with that theme.
Maintaining the Arbor
- Regular Cleaning: Clean your arbor regularly to remove dirt, debris, and cobwebs. This will help to prevent the buildup of mildew and maintain its appearance.
- Pest Control: Inspect your arbor for pests, such as insects or rodents, and take appropriate measures to control them.
- Repainting or Restaining: Repaint or restain your arbor every few years to protect the wood from the elements and maintain its color and finish.
- Pruning: Prune climbing plants regularly to maintain their shape and encourage healthy growth.
Inspiration and Design Ideas
A garden arbor can be more than just a structure; it can be a focal point that adds charm and character to your outdoor space. It can be a place to relax, entertain, or simply enjoy the beauty of your garden.
This section will explore various design ideas for your DIY garden arbor and how to incorporate it into your garden landscape.
Different Design Ideas
The possibilities for garden arbor designs are endless, ranging from simple and classic to elaborate and whimsical. Here are some ideas to inspire you:
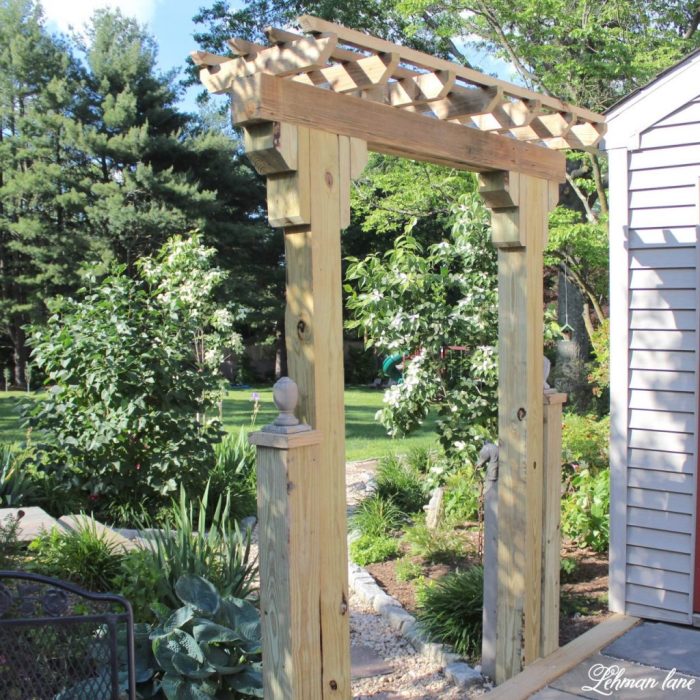
- Classic Trellis Arbor: This is a simple and elegant design that is perfect for growing climbing plants. It typically consists of four vertical posts with horizontal crosspieces forming a lattice pattern. You can personalize it by adding decorative elements such as finials or scrolls.
- Arched Arbor: This is a more dramatic design that creates a grand entrance to a garden or walkway. The arch can be made from wood, metal, or even stone, and can be decorated with climbing plants or flowers. The arch can be a focal point for the garden, leading to a seating area, a pond, or a sculpture.
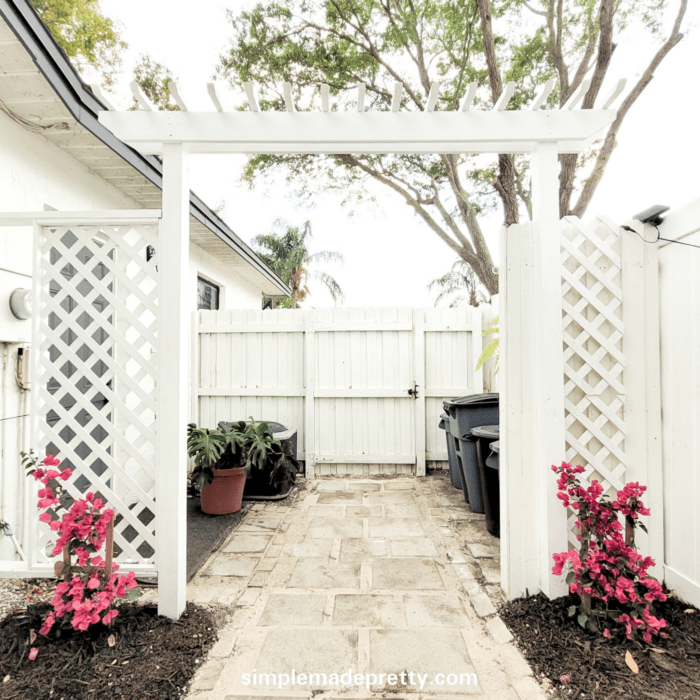
- Pergola Arbor: This is a more modern design that is perfect for creating shade or a cozy outdoor dining area. It typically consists of a series of beams that are supported by posts, and can be adorned with climbing plants or vines.
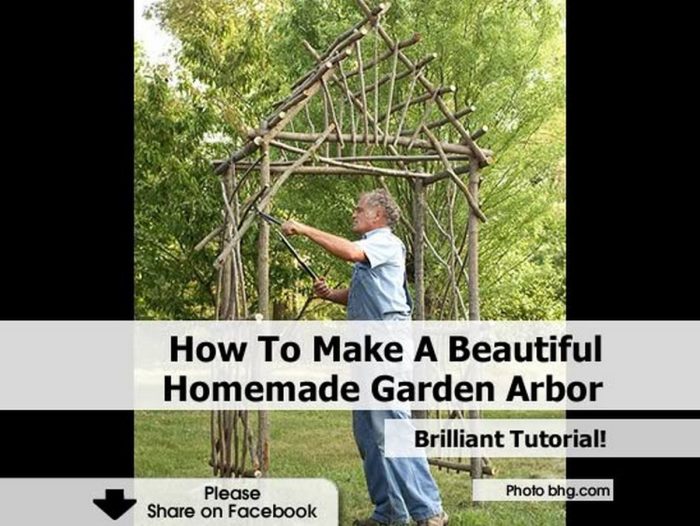
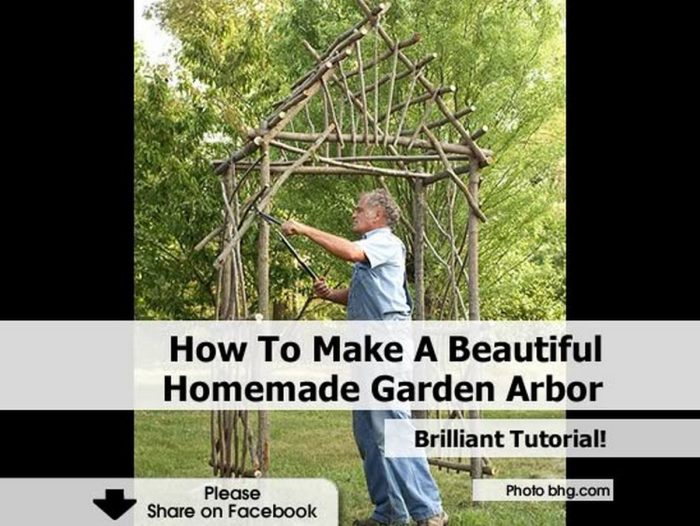
- Rustic Arbor: This is a charming and natural design that is perfect for adding a touch of country charm to a garden. It can be made from reclaimed wood, branches, or stones, and can be decorated with rustic elements such as lanterns, birdhouses, or weathered signs.
- Modern Arbor: This is a sleek and minimalist design that is perfect for adding a touch of contemporary style to a garden. It can be made from metal, wood, or even concrete, and can be decorated with geometric patterns or modern lighting.
Incorporating the Arbor into the Garden Landscape
The placement of your garden arbor is crucial to its impact on your landscape. Here are some ideas for incorporating it into your garden:
- Entranceway: Create a welcoming entrance to your garden by placing an arbor at the gateway. This can be a simple trellis arbor or a more elaborate arched arbor. Consider planting climbing plants to create a green canopy overhead.
- Focal Point: Use an arbor to draw attention to a specific area of your garden, such as a sculpture, a fountain, or a seating area. You can create a focal point by using an arched arbor or a pergola arbor with a decorative roof.
- Path Divider: Create a sense of separation between different areas of your garden by placing an arbor along a path or walkway. This can be a simple trellis arbor or a more elaborate design with a bench or seating area underneath.
- Garden Room: Create a secluded and private space in your garden by placing an arbor around a seating area or a dining table. You can create a sense of enclosure by using climbing plants to create a green wall around the arbor.
- Outdoor Kitchen: An arbor can be used to create a cozy and inviting space for an outdoor kitchen. You can place the arbor over a grill, a bar, or a dining table.
Lighting and Decorative Elements
Lighting can enhance the beauty of your garden arbor and create a magical ambiance in the evening. Here are some ideas for incorporating lighting into your arbor design:
- String Lights: String lights are a popular choice for adding a touch of whimsy and charm to an arbor. They can be hung from the top of the arbor or wrapped around the posts.
- Lanterns: Lanterns can be hung from the arbor or placed on the ground nearby. They can be made from wood, metal, or glass, and can be decorated with candles, solar lights, or LED lights.
- Fairy Lights: Fairy lights are small, battery-powered lights that can be used to create a magical glow around an arbor. They can be strung along the top of the arbor or wrapped around the posts.
- Uplighting: Uplighting can be used to highlight the structure of the arbor and create a dramatic effect. You can use spotlights to illuminate the posts or the roof of the arbor.
In addition to lighting, you can add other decorative elements to your arbor to personalize it and enhance its beauty. Here are some ideas:
- Climbing Plants: Climbing plants are a beautiful way to add color and greenery to an arbor. Consider using roses, clematis, honeysuckle, or wisteria. Choose plants that are appropriate for your climate and growing conditions.
- Hanging Baskets: Hanging baskets can be used to add color and texture to an arbor. You can plant flowers, herbs, or trailing plants in the baskets.
- Birdhouses: Birdhouses can be attached to the posts of the arbor to attract birds to your garden. Choose birdhouses that are appropriate for the types of birds in your area.
- Wind Chimes: Wind chimes can be hung from the arbor to add a soothing sound to your garden. Choose wind chimes that are made from materials that will not rust or corrode.
- Sculptures: Sculptures can be placed near the arbor to add a touch of art to your garden. Choose sculptures that complement the style of your arbor and the overall theme of your garden.
Safety Considerations: Diy Garden Arbor

Building a garden arbor is a rewarding project, but it’s essential to prioritize safety throughout the construction process. By following safety guidelines and using tools and materials responsibly, you can minimize risks and ensure a successful and enjoyable experience.
Using Power Tools Safely
Power tools can be incredibly useful for building a garden arbor, but they also pose potential hazards if not used correctly.
- Always wear appropriate safety gear, including eye protection, hearing protection, and work gloves.
- Ensure the power cord is in good condition and free from damage.
- Keep your work area clean and free of clutter to prevent tripping hazards.
- Never operate power tools while fatigued or under the influence of alcohol or drugs.
- Always use the correct tools for the job and follow the manufacturer’s instructions.
- Be aware of the kickback potential of power tools and take precautions to avoid it.
Handling Wood Safely
Wood is a common material for garden arbors, but it can also present safety risks.
- Always use caution when handling sharp tools, such as saws and chisels.
- Wear work gloves to protect your hands from splinters and cuts.
- Use a sawhorse or work table to support the wood while cutting to prevent it from falling.
- Be aware of the direction of the grain when cutting wood to avoid kickback.
- Store wood properly to prevent it from warping or becoming damaged.
Working at Heights
If your garden arbor requires working at heights, it’s crucial to take extra precautions.
- Use a sturdy ladder or scaffolding that is rated for the weight you will be supporting.
- Always have someone spot you when working at heights.
- Wear a safety harness if working at heights above a certain distance.
- Never stand on the top step of a ladder.
- Be aware of overhead power lines and avoid working near them.
Building a DIY garden arbor is a rewarding experience that allows you to personalize your outdoor space and create a haven for relaxation and enjoyment. With careful planning, the right materials, and a bit of creativity, you can transform your garden into a breathtaking oasis with a unique and functional arbor that reflects your personal style.
Building a DIY garden arbor is a great way to add a touch of elegance and privacy to your outdoor space. You can even incorporate a cozy nook for reading or relaxing, perhaps inspired by the design of a DIY feral cat shelter which provides a safe haven for our feline friends. The same principles of shelter and comfort can be applied to a garden arbor, creating a welcoming retreat for yourself and your guests.

