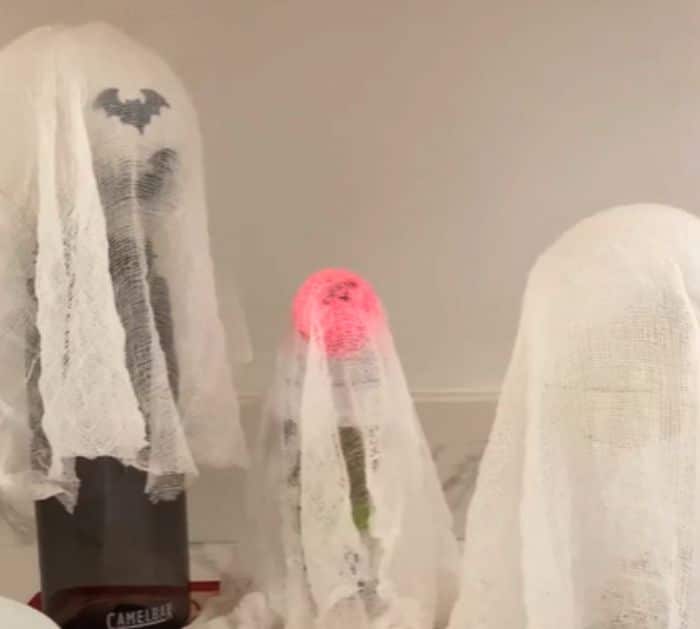
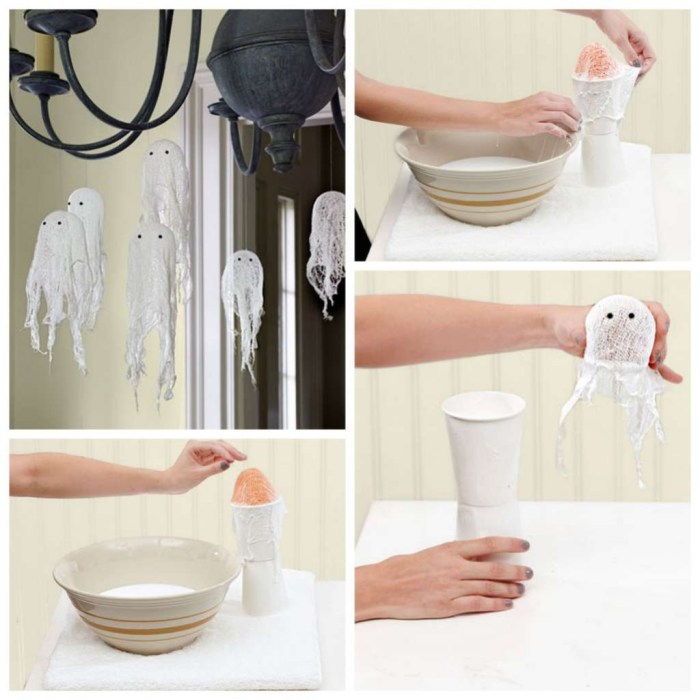
DIY Halloween Ghost: More than just a spooky decoration, crafting your own Halloween ghost is a fun and creative way to personalize your holiday decor. The allure of DIY ghosts lies in the ability to bring your own unique vision to life, creating a truly personalized and memorable Halloween experience.
From classic white sheet ghosts to whimsical, glowing creations, there’s a DIY ghost project for everyone. Whether you’re a seasoned crafter or a beginner, you’ll find easy-to-follow instructions and inspiring ideas to create spooky and charming ghosts that will haunt your home with delight.
Materials and Tools for DIY Ghost Creation

Creating a DIY Halloween ghost is a fun and creative project that allows you to unleash your artistic side and personalize your spooky decorations. With a little imagination and the right materials, you can transform simple items into ghostly figures that will haunt your home with charm. Let’s explore the materials and tools needed to bring your ghostly creations to life.
Fabric
Fabric is a popular choice for crafting ghosts, offering a wide range of textures and colors to create different looks.
- White Muslin: This lightweight and breathable fabric is an excellent choice for traditional ghost creations. Its sheer texture allows light to pass through, creating a ghostly ethereal effect.
- Cheesecloth: This loosely woven fabric, commonly used in kitchens, adds a rustic and aged look to your ghost. It’s perfect for creating a tattered and spooky effect.
- Cotton Fabric: Choose a soft and drapable cotton fabric for a more refined and elegant ghost. Cotton is also easy to work with and can be dyed or painted for a unique look.
- Old Sheets: Don’t discard those old sheets! They can be repurposed into spooky ghosts. The worn and faded look adds to the ghostly atmosphere.
Paper
Paper is another versatile material for crafting ghosts, offering a more affordable and lightweight option.
- White Construction Paper: This readily available paper is perfect for simple ghost cutouts. You can easily fold, cut, and decorate it to create various ghost shapes.
- Tissue Paper: The delicate texture of tissue paper lends itself well to creating ethereal and translucent ghosts. Layer different colors of tissue paper for a unique and layered effect.
- Cardboard: Use sturdy cardboard to create the base of your ghost. It can be painted, decorated, and even used as a stand for larger ghost figures.
Lighting
Lighting is essential for creating a spooky atmosphere and highlighting your ghostly creations.
- LED String Lights: These energy-efficient lights are perfect for adding a soft glow to your ghost. You can wrap them around the fabric or paper to create a shimmering effect.
- Tea Lights: Place tea lights inside a paper lantern or a hollowed-out pumpkin to create a warm and inviting glow. The flickering light adds a touch of mystery to your ghost.
- Glow Sticks: These inexpensive light sources can be used to add a vibrant glow to your ghost. You can attach them to the fabric or paper using tape or glue.
Accessories
Accessories add personality and detail to your ghostly creations.
- Black Felt: Use black felt to create eyes, mouths, and other facial features for your ghost. You can cut out shapes or use a fabric marker to draw directly onto the felt.
- Googly Eyes: These fun and playful eyes are perfect for adding a whimsical touch to your ghost. Choose different sizes and colors to create unique expressions.
- Yarn: Use yarn to create hair or a flowing scarf for your ghost. You can also use yarn to create a web-like effect around your ghost.
- Beads: Add beads to your ghost’s costume for a touch of sparkle and shine. You can use beads to create a necklace, bracelet, or even a belt for your ghost.
Tools
- Scissors: Sharp scissors are essential for cutting fabric, paper, and other materials.
- Sewing Machine: If you’re using fabric, a sewing machine will help you create a professional-looking ghost. You can use it to sew the fabric together, add embellishments, and create a more durable ghost.
- Hot Glue Gun: A hot glue gun is a versatile tool for attaching accessories, securing fabric, and creating a strong bond between different materials.
- Fabric Markers: Use fabric markers to draw eyes, mouths, and other details on your ghost. Choose permanent markers that won’t fade or bleed.
- Paintbrushes: If you’re painting your ghost, you’ll need paintbrushes of different sizes to apply paint evenly.
- Tape Measure: A tape measure is helpful for measuring fabric and paper before cutting.
Classic DIY Ghost Techniques: Diy Halloween Ghost
Classic DIY ghost techniques are simple, fun, and perfect for adding a spooky touch to your Halloween decor. These methods use readily available materials, making them accessible for everyone to create.
Creating a Traditional White Sheet Ghost
Creating a traditional white sheet ghost is a classic Halloween craft that requires minimal effort and yields impressive results.
- Gather your materials: You’ll need a white sheet, a pair of scissors, a marker, and string or ribbon.
- Cut out the ghost shape: Fold the sheet in half and cut a semicircle along the folded edge. This will form the ghost’s head. You can adjust the size of the semicircle to create a ghost of the desired size.
- Draw facial features: Use the marker to draw eyes, a mouth, and a nose on the sheet. You can make your ghost friendly or scary, depending on your preference.
- Hang the ghost: Tie a piece of string or ribbon to the top of the sheet and hang it from a hook or a tree branch. You can adjust the height to create a dramatic effect.
Creating a Ghost Using a Simple Paper Bag, Diy halloween ghost
Creating a ghost using a simple paper bag is a quick and easy craft that’s perfect for kids.
- Gather your materials: You’ll need a white paper bag, a pair of scissors, a marker, and glue or tape.
- Cut out the ghost shape: Cut a semicircle at the top of the paper bag, forming the ghost’s head. You can adjust the size of the semicircle to create a ghost of the desired size.
- Draw facial features: Use the marker to draw eyes, a mouth, and a nose on the paper bag. You can add details like a spooky smile or a mischievous grin.
- Attach the ghost: Glue or tape the ghost to a wall or a window for a spooky decoration.
Creating a Ghost Using Balloons and Fabric
Creating a ghost using balloons and fabric is a creative and versatile technique that allows for various sizes and shapes.
- Gather your materials: You’ll need a white balloon, white fabric, scissors, glue, and string or ribbon.
- Inflate the balloon: Inflate the balloon to the desired size for your ghost. You can choose a round balloon for a classic ghost shape or an elongated balloon for a more whimsical look.
- Cut and drape the fabric: Cut a piece of white fabric larger than the balloon. Drape the fabric over the balloon, ensuring it covers the entire surface. You can adjust the fabric to create folds and layers for a more textured ghost.
- Secure the fabric: Glue the fabric to the balloon, securing it in place. You can use a glue gun for a faster and stronger bond.
- Add details: Once the fabric is secure, you can add details like eyes, a mouth, and a nose. You can use fabric scraps, felt, or even paint to create these features.
- Hang the ghost: Tie a piece of string or ribbon to the top of the balloon and hang it from a hook or a tree branch. You can adjust the height to create a dramatic effect.
Creative DIY Ghost Variations

You’ve mastered the basics of ghost-making, but now it’s time to unleash your creativity! Let’s explore some unique ways to add personality and flair to your ghostly creations.
Think beyond the traditional white sheet and explore the possibilities of unique features, diverse shapes, and unexpected materials. These variations will make your ghosts stand out and truly capture the spirit of Halloween.
Unique Ghost Features
Adding unique features to your ghosts is a fun way to give them personality. You can experiment with glowing eyes, spooky accessories, or even whimsical personalities.
- Glowing Eyes: Create a truly eerie effect by incorporating glowing eyes. Use LED tea lights, battery-operated fairy lights, or even glow-in-the-dark paint for a spooky glow. For a more realistic look, cut out small eye shapes from the ghost’s fabric and place the light source behind them.
- Spooky Accessories: Add a touch of fright with spooky accessories like miniature bats, spiders, or even a small cauldron. Attach these items with glue, pins, or thread to your ghost’s fabric. For a whimsical touch, consider using a tiny witch’s hat or a pumpkin-shaped lantern.
- Whimsical Personalities: Give your ghosts personalities by incorporating different colors, patterns, or textures. A bright pink ghost with polka dots could be playful, while a tattered, grey ghost with a mournful expression could be more eerie.
Ghosts of Varying Sizes and Shapes
You can create ghosts of all sizes and shapes, from tiny ghosts for a tabletop display to large ghosts that will haunt your entire porch.
- Small Ghosts: Use small pieces of fabric, balloons, or even paper bags to create miniature ghosts. These are perfect for decorating shelves, tables, or even a spooky centerpiece.
- Large Ghosts: For larger ghosts, use sheets, curtains, or even old clothing. You can create a traditional ghost shape by draping the fabric over a frame or simply stuffing it with pillows or blankets. For a more whimsical look, experiment with different shapes, such as a round ghost or a long, skinny ghost.
- Ghostly Silhouettes: Create ghostly silhouettes by cutting out shapes from black or dark-colored fabric or paper. These silhouettes can be hung on walls, windows, or even strung together to create a spooky garland.
Different Materials and Textures
Don’t limit yourself to traditional white sheets! Experiment with different materials and textures to create unique ghost aesthetics.
- Lace and Tulle: Use lace and tulle to create delicate and ethereal ghosts. These materials will add a touch of elegance and whimsy to your spooky creations.
- Burlap and Linen: For a rustic and vintage look, use burlap or linen. These materials will give your ghosts a weathered and aged appearance.
- Felt and Fleece: Felt and fleece are great for creating soft and cuddly ghosts. These materials are also easy to work with and can be cut into any shape.
Creating DIY Halloween ghosts is an enjoyable and rewarding experience. With a little creativity and some simple materials, you can transform your home into a spooky haven filled with charming, handcrafted ghosts. Let your imagination run wild and embrace the fun of DIY Halloween decorating. Happy haunting!
Creating a DIY Halloween ghost can be a fun and creative project. You might need to stay up late to finish your spooky masterpiece, and if you find yourself struggling to stay awake, you might consider a stimulant like modafinil. However, remember to consult a doctor before using any medication, as it’s important to ensure it’s safe and appropriate for you.
Once you’ve completed your ghost, you’ll be ready to spook your neighbors and enjoy a festive Halloween!

