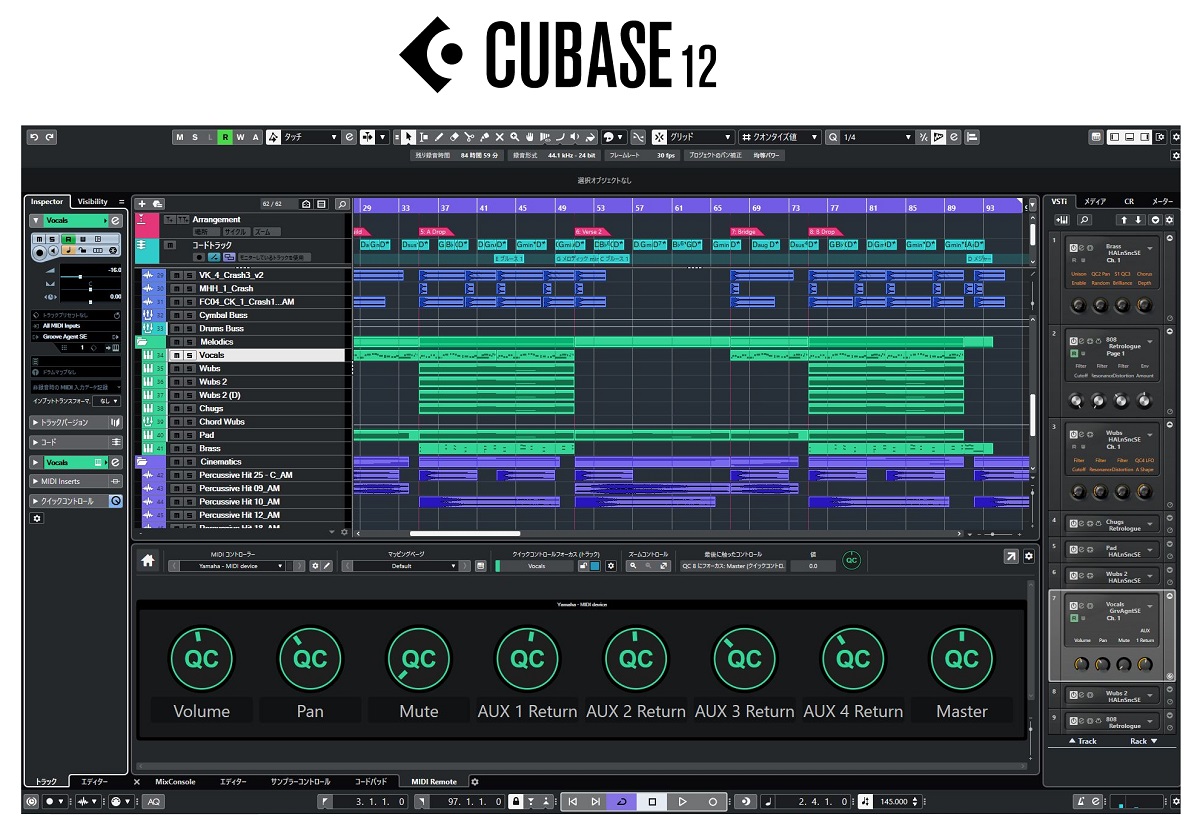
Cubase 12 isn’t just another DAW update; it’s a powerhouse of new features and workflow improvements designed to supercharge your music production. From its revamped audio engine to its enhanced MIDI editing capabilities, Cubase 12 offers a streamlined and intuitive experience for both seasoned pros and aspiring musicians. This guide dives deep into everything you need to know to master this incredible digital audio workstation, covering everything from system requirements to advanced mixing and mastering techniques.
We’ll explore the key new features that make Cubase 12 stand out, examine its powerful audio engine, and walk you through efficient workflows for MIDI editing, VST integration, and more. Whether you’re composing orchestral scores, crafting electronic beats, or anything in between, this comprehensive guide will equip you with the knowledge to unleash Cubase 12’s full potential and elevate your music production game.
Cubase 12 System Requirements
So, you’re ready to dive into Cubase 12? Awesome! Before you start crafting your next masterpiece, let’s make sure your system can handle it. Knowing the system requirements will prevent frustrating crashes and ensure a smooth workflow. We’ll break down the minimum and recommended specs, and look at how different hardware components impact performance.
Cubase 12, like any high-end DAW, demands a pretty beefy system to run optimally, especially if you’re working with large projects and lots of plugins. The more demanding your projects are (think massive orchestral scores or complex electronic tracks), the more powerful your system needs to be.
System Requirements for Cubase 12
| Component | Minimum | Recommended | Notes |
|---|---|---|---|
| Operating System | Windows 10 (64-bit), macOS 10.15 or higher (64-bit) | Windows 11 (64-bit), macOS Ventura (64-bit) or higher | 64-bit OS is essential for Cubase 12. Newer OS versions often include performance improvements and bug fixes. |
| Processor | Intel Core i5 or AMD Ryzen 5 equivalent | Intel Core i7 or AMD Ryzen 7 equivalent or better | More cores and higher clock speeds translate to smoother performance, especially when using many plugins or processing large audio files. |
| RAM | 8 GB | 16 GB or more | RAM is crucial. More RAM allows Cubase to handle more tracks, instruments, and plugins without slowing down. 32GB is increasingly becoming the sweet spot for professional work. |
| Hard Drive Space | 10 GB | SSD with 50 GB free space recommended | An SSD (Solid State Drive) is strongly recommended for faster project loading and overall responsiveness. A traditional HDD will significantly impact performance. |
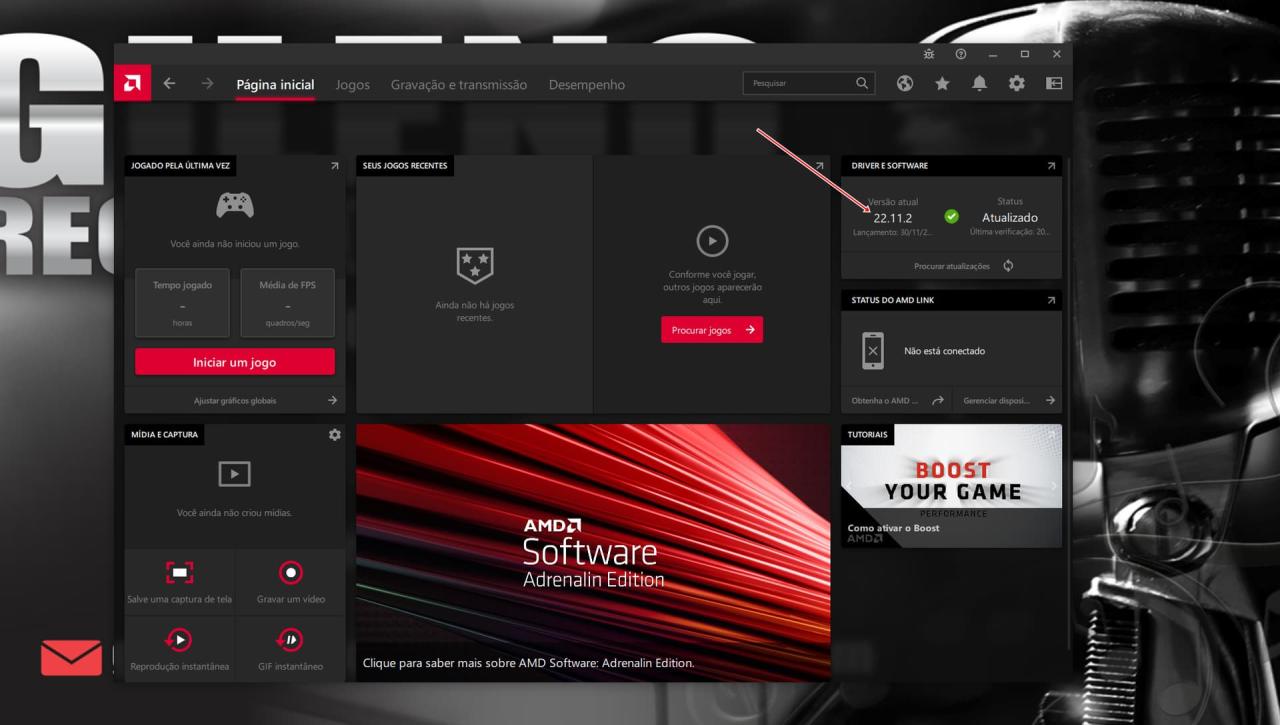
| Graphics Card | Onboard graphics (integrated) | Dedicated graphics card (e.g., NVIDIA GeForce GTX 1650 or AMD Radeon RX 570 or better) | While Cubase doesn’t heavily rely on the graphics card, a dedicated card can improve performance with certain features and plugins, especially those with graphical interfaces. |
| Audio Interface (Optional but Recommended) | N/A | ASIO compatible audio interface | An audio interface provides lower latency and higher quality audio recording capabilities compared to built-in sound cards. |
CPU Architecture Impact on Cubase 12 Performance
Both Intel and AMD CPUs offer strong performance in Cubase 12. The choice often comes down to specific model, core count, and clock speed. Generally, more cores and higher clock speeds lead to better performance. For example, a high-core-count AMD Ryzen Threadripper processor might excel in handling large, complex projects, while a high-clock-speed Intel Core i9 might offer advantages in specific plugin processing tasks.
Ultimately, benchmarks and user experiences should guide your decision.
Integrated vs. Dedicated Graphics Card Performance in Cubase 12
While Cubase 12 doesn’t heavily utilize the graphics card, a dedicated graphics card will generally offer a smoother experience, especially if you use plugins with graphical interfaces or are running other applications simultaneously. An integrated graphics card will likely be sufficient for basic tasks, but may lead to noticeable lag or stuttering with more demanding projects or plugins. A dedicated card offers a more stable and responsive environment for a smoother workflow.
New Features in Cubase 12
Cubase 12 boasts a range of exciting new features and workflow improvements designed to streamline the music production process and enhance creative possibilities. This update focuses on enhancing existing tools and introducing innovative features that address common user needs and push the boundaries of what’s possible within the DAW. Let’s dive into some of the key highlights.
Improved Sample Editing
Cubase 12 significantly enhances its sample editing capabilities. The new Sample Editor boasts a redesigned interface with improved zoom functionality and a more intuitive workflow for tasks like time-stretching, pitch-shifting, and loop creation. For example, the improved time-stretching algorithm provides more natural-sounding results, especially with complex rhythmic patterns and heavily processed samples. The new waveform display offers clearer visualization, making it easier to identify and edit specific sections of the sample.
These enhancements save significant time and effort in sample preparation, allowing producers to focus more on the creative aspects of their projects.
Cubase 12’s workflow is pretty slick, but sometimes I need to look up a quick tutorial. To do that, I usually fire up my internet browser and search YouTube. After that, I’m usually back to tweaking MIDI in Cubase 12, feeling much more productive. It’s a pretty efficient system, honestly.
Enhanced MIDI Editor Functionality
The MIDI Editor receives a substantial upgrade in Cubase 12, with several new features aimed at improving workflow and creative control. One key improvement is the introduction of improved chord detection and manipulation tools. This allows for easy chord voicings and modifications, saving considerable time when working with complex harmonies. Furthermore, the enhanced note entry system offers quicker and more precise note placement, making it ideal for intricate melodic lines or complex rhythmic patterns.
The new “Smart Quantize” feature intelligently quantizes MIDI notes based on the surrounding musical context, resulting in more musical and natural-sounding results compared to traditional quantization methods.
Improved Automation Capabilities
Cubase 12 offers a substantial overhaul of its automation capabilities. The new automation lanes provide a more visually intuitive way to manage and edit automation data, with improved visual feedback and easier access to key parameters. For instance, the new “Draw Automation” mode allows for precise and freeform automation drawing, offering greater control over subtle nuances in mixing and effects processing.
Additionally, the updated automation clip functionality makes it easier to create, edit, and manage automation clips, enhancing workflow efficiency. This results in more dynamic and expressive mixes, allowing for greater control over the sonic landscape of a project.
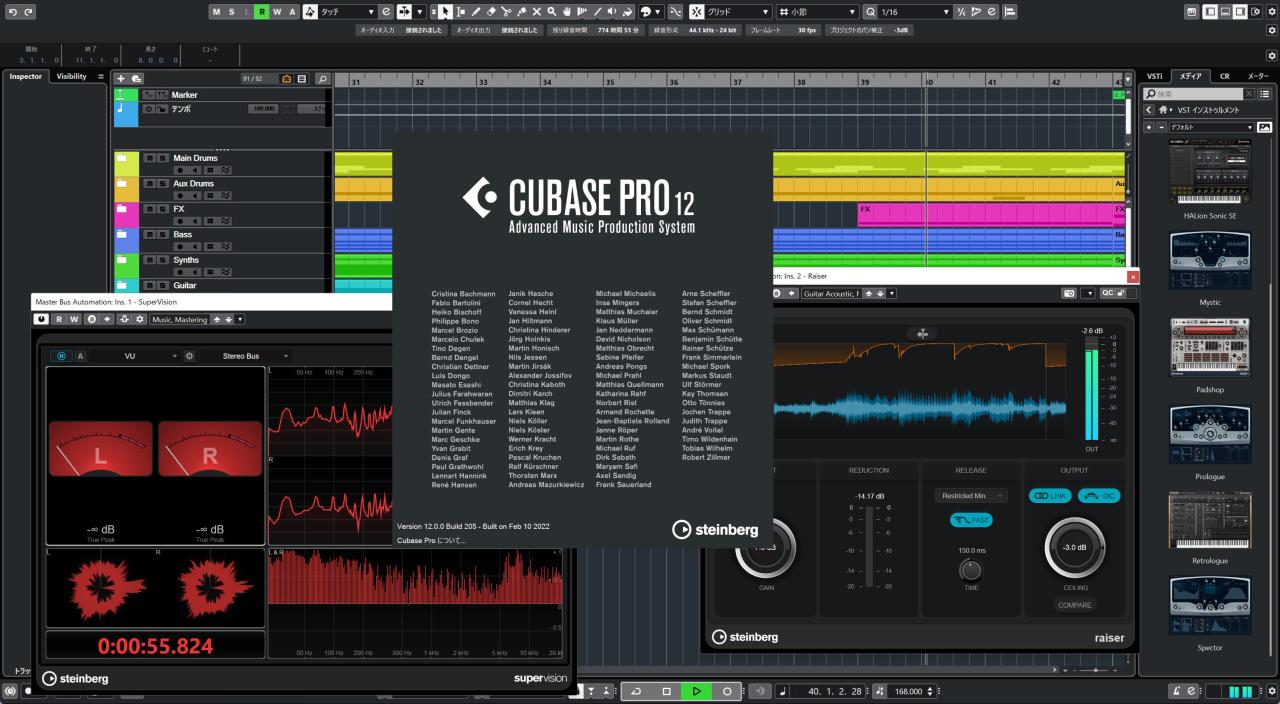
Cubase 12’s Audio Engine
Cubase 12 boasts a significantly revamped audio engine, promising improvements in performance, stability, and workflow. It’s built upon years of development and user feedback, aiming to address common pain points and enhance the overall user experience for a wide range of projects, from intricate orchestral compositions to complex electronic music productions. Understanding its architecture and capabilities is key to maximizing its potential.The architecture of Cubase 12’s audio engine is a complex interplay of several components working in concert.
At its core, it leverages Steinberg’s proprietary processing technology, optimized for low latency and efficient resource management. This involves advanced buffer handling, intelligent thread management, and optimized signal processing algorithms. The engine is designed to handle a large number of tracks and plugins concurrently, while minimizing CPU load and maintaining audio quality. However, even with these optimizations, limitations can arise depending on system resources and the complexity of the project.
For instance, extremely high track counts with demanding plugins might still push even high-end systems to their limits.
Audio Engine Performance Compared to Previous Versions
Cubase 12 shows substantial performance gains compared to its predecessors. Specifically, improvements in latency compensation and efficient plugin handling are noticeable. Users have reported significant reductions in crackles and pops, even when working with large projects featuring many virtual instruments and effects. Benchmarks, though varying depending on system specifications, consistently show a considerable improvement in overall processing speed and responsiveness, particularly noticeable when working with large sample libraries or complex effects chains.
While earlier versions sometimes struggled with high track counts or resource-intensive plugins, Cubase 12 exhibits improved stability and smoother performance under pressure. This translates to a more fluid and less frustrating workflow, even for demanding projects.
Optimizing Audio Settings for Different Project Types
Optimizing Cubase 12’s audio settings is crucial for achieving optimal performance and preventing audio issues. The specific settings will vary depending on the project’s nature and system capabilities.For large orchestral scores, prioritizing low latency is paramount. This requires setting a smaller buffer size, potentially sacrificing some CPU efficiency for improved responsiveness. However, this may necessitate a more powerful system to prevent audio dropouts or excessive CPU load.
Furthermore, careful selection of virtual instruments and effects is essential, opting for efficient alternatives over resource-intensive options where possible. Using sample libraries optimized for low latency and avoiding excessive effects processing will further contribute to smooth performance.In contrast, electronic music projects often involve extensive use of virtual instruments and effects, potentially leading to high CPU load. For these projects, a larger buffer size might be preferred, trading off some latency for increased CPU headroom.
Utilizing efficient plugins and employing techniques like freezing tracks or bouncing audio can significantly alleviate CPU strain. Also, leveraging Cubase’s features like the VariAudio editor, which allows for efficient pitch correction and time stretching, can free up CPU resources. The key is finding the balance between latency and CPU usage that best suits the specific demands of the project and the capabilities of the user’s system.
MIDI Editing in Cubase 12
Cubase 12’s MIDI editor is a powerhouse for crafting intricate musical ideas. Its extensive features go beyond basic note entry, offering advanced tools for manipulating MIDI data with precision and efficiency. Whether you’re composing complex melodies, creating intricate drum patterns, or sculpting nuanced synth lines, understanding these tools is key to unlocking your creative potential within the DAW.
This section delves into the capabilities of Cubase 12’s MIDI editor, providing a practical guide to its advanced features and comparing it to other popular Digital Audio Workstations (DAWs).
Creating a Complex MIDI Sequence Using Advanced MIDI Editing Tools
Let’s walk through creating a complex MIDI sequence, highlighting some of Cubase 12’s powerful MIDI editing tools. This example will focus on creating a layered melodic and rhythmic sequence.
- Creating the Melody: Start by inputting a basic melody using your MIDI keyboard or mouse. Experiment with different note lengths and velocities to add expression. Cubase 12’s piano roll interface makes this straightforward. You can zoom in and out for precise note placement.
- Adding Harmonies: Duplicate the melody track. Use the “Transpose” function to create harmonies (e.g., a third or fifth above the original melody). Adjust the velocity and panning to create a fuller, more spatial sound. Cubase’s ability to visually manipulate multiple MIDI tracks simultaneously simplifies this process.
- Creating a Drum Pattern: Create a new MIDI track for drums. Use the drum editor’s various tools to program a complex beat. Cubase 12’s drum editor provides various quantization options, allowing you to easily create a perfectly timed groove.
- Adding Automation: Automate parameters such as volume, pan, and effects sends to add dynamics and movement to your sequence. Cubase 12’s automation lanes provide a visual representation of these changes, making it easy to edit and refine them.
- Using MIDI Effects: Experiment with MIDI effects such as arpeggiators, chord generators, and quantizers to add interesting variations and textures to your MIDI data. These effects can significantly enhance the complexity and creativity of your compositions.
- Refining the Sequence: Use Cubase 12’s powerful editing tools such as the “Slice and Dice” function, to further refine your sequence. You can easily adjust note positions, velocities, and other parameters for greater precision and nuance. The extensive selection tools within Cubase 12’s MIDI editor make it easy to work with large sections of MIDI data.
MIDI Editor Comparison with Other Popular DAWs
Cubase 12’s MIDI editor stacks up favorably against other popular DAWs. While features vary, Cubase excels in its depth and visual clarity. Let’s compare it with Logic Pro X and Ableton Live.
| Feature | Cubase 12 | Logic Pro X | Ableton Live |
|---|---|---|---|
| Piano Roll Functionality | Highly detailed, with extensive editing options and visual clarity. | Powerful piano roll with a strong focus on workflow efficiency. | More streamlined piano roll, prioritizing quick editing and improvisation. |
| Automation Capabilities | Comprehensive automation options with various modes and visual feedback. | Robust automation features with a strong focus on automation clips. | Flexible automation system, emphasizing clip-based automation. |
| MIDI Effects | Wide range of built-in MIDI effects with advanced parameters. | A solid selection of MIDI effects, often integrated with other features. | Strong emphasis on flexible routing and manipulation of MIDI effects. |
Efficient MIDI Editing Workflow in Cubase 12
Establishing an efficient workflow is crucial for maximizing productivity in MIDI editing. The following strategies, including macro usage and keyboard shortcuts, will streamline your process.
Cubase 12 offers extensive customization options. Creating custom macros for frequently used tasks such as quantizing, transposing, or applying specific MIDI effects will significantly speed up your workflow. Learning and utilizing Cubase’s extensive keyboard shortcuts is equally important. These shortcuts provide rapid access to essential editing tools, eliminating the need for mouse clicks and improving overall efficiency.
For example, mastering the shortcuts for note selection, transposition, and velocity adjustments will drastically reduce editing time.
Working with VST Instruments and Effects in Cubase 12
So, you’ve got Cubase 12 fired up and you’re ready to make some music. But the stock sounds are, let’s be honest, a little…basic. That’s where VST instruments and effects come in. These plugins are the secret sauce to crafting unique and professional-sounding tracks, adding tons of sonic possibilities to your workflow. Let’s dive into how to get them up and running.Integrating third-party VST instruments and effects into Cubase 12 is generally a straightforward process.
First, you’ll need to locate the VST plugin files (usually .dll or .vst3 files on Windows, and .vst3 or .component files on macOS). Then, in Cubase, go to Devices > VST Instruments or Devices > VST Effects, depending on what you’re adding. You’ll likely need to scan your plugin folders to ensure Cubase can find your newly downloaded instruments and effects.
Once scanned and recognized, they’ll appear in the respective menus, ready to be added to your tracks. Simply drag and drop the plugin onto a track to start using it. Remember to check your plugin’s manual for specific instructions, as some might require additional setup.
Recommended VST Instruments and Effects
Choosing the right VSTs can be overwhelming, but focusing on quality over quantity will help. The list below provides a diverse selection, spanning various genres and needs. Remember, these are just suggestions; the best plugins for you will depend on your specific musical style and preferences.
| Plugin Name | Type | Genre | Description |
|---|---|---|---|
| Native Instruments Kontakt | Sampler | Various | A powerful and versatile sampler capable of handling massive libraries of sounds. It’s a workhorse for many producers, offering incredible flexibility and realism. |
| Arturia V Collection | Synthesizer Collection | Various | A bundle of meticulously modeled classic synthesizers, emulating legendary hardware synths like the Minimoog and Prophet-5. |
| FabFilter Pro-Q 3 | EQ | Various | A highly regarded equalizer known for its intuitive interface and precise control over your frequencies. |
| Waves plugins (various) | Various | Various | Waves offers a wide range of plugins, including compressors, reverbs, and more, known for their professional quality and sonic impact. Consider their CLA series for classic rock and pop sounds. |
| iZotope Ozone | Mastering Suite | Various | A comprehensive mastering suite offering a streamlined workflow for polishing your final mixes. |
| Soundtoys plugins (various) | Effects | Various | Soundtoys provides creative and unique effects, such as the Decapitator distortion and the EchoBoy delay, known for their character and musicality. |
Troubleshooting VST Issues
Even with the best-laid plans, sometimes things go wrong. Here are some common issues and how to tackle them:Plugin crashes or freezes: This can happen due to several factors including outdated plugins, conflicting plugins, insufficient system resources (RAM, CPU), or driver issues. Try updating your plugins, closing unnecessary applications, increasing your system’s RAM, and reinstalling or updating your audio drivers.
If the problem persists, try disabling plugins one by one to identify the culprit.Audio crackling or distortion: This could be caused by CPU overload, incorrect buffer settings in Cubase, or issues with your audio interface. Check your Cubase buffer settings (lowering them can improve performance but increase CPU load), make sure your audio interface drivers are up-to-date, and consider upgrading your system’s processing power if needed.Plugin not showing up: Ensure that the plugin is properly installed and that Cubase has scanned your plugin folders.
Check Cubase’s preferences to confirm the correct plugin paths are specified. Re-scanning your plugin folders usually solves this.Authorization problems: Some plugins require activation or authorization. Make sure you’ve followed the instructions from the plugin manufacturer to properly authorize your software. Contact the manufacturer’s support if you encounter problems.Remember, consulting the documentation for both Cubase and your specific VSTs is key to resolving most issues.
The online communities and forums dedicated to Cubase and various VST plugins are also great resources for finding solutions to specific problems.
Mixing and Mastering in Cubase 12
Cubase 12 offers a robust suite of tools for mixing and mastering, allowing users to achieve professional-sounding results. Its intuitive interface and powerful processing capabilities make it a popular choice for both beginners and seasoned professionals. This section will explore best practices, available tools, and a suggested workflow for achieving a polished final product.
Efficient mixing and mastering in Cubase 12 hinges on a well-organized workflow and a deep understanding of the available tools. Understanding the interplay between gain staging, equalization, compression, and other effects is crucial for a successful mix. Mastering, the final stage, focuses on optimizing the overall loudness and sonic characteristics of your project for various playback systems.
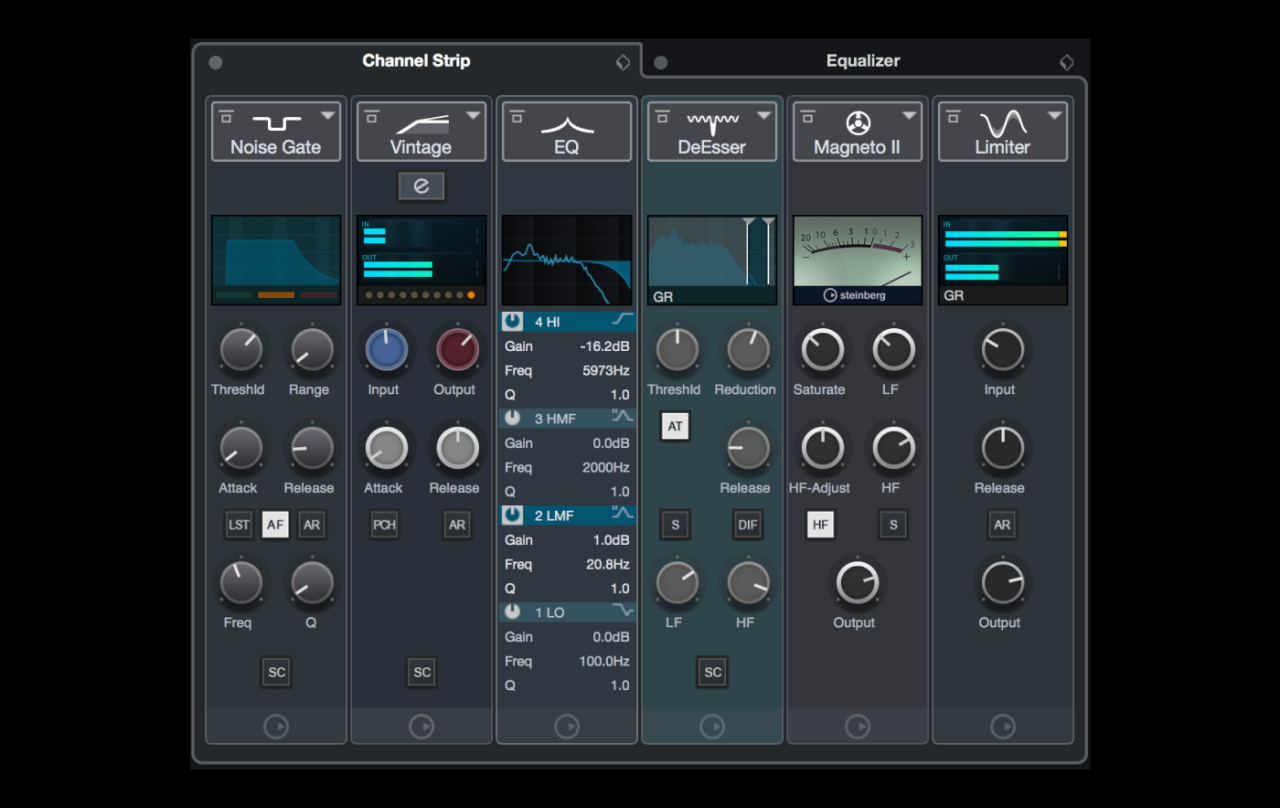
Mixing Tools and Functionalities, Cubase 12
Cubase 12 provides a comprehensive set of mixing tools, including channel strips with EQ, compression, and dynamics processing; auxiliary sends for creating reverb, delay, and other effects; and a versatile routing system for complex signal flows. The channel strip offers parametric EQ for precise frequency adjustments, various compressor types for dynamic control, and gate/expander for noise reduction.
Aux sends allow for flexible effects processing, and the routing capabilities enable intricate signal management for achieving specific sonic characteristics. For example, using multiple aux sends allows for separate reverb applications on different instruments, creating a richer and more nuanced soundscape.
Mastering Tools and Functionalities
Mastering in Cubase 12 typically involves using a dedicated mastering chain on a stereo bus. This chain might include a mastering-grade EQ for subtle tonal adjustments, a limiter to control the overall loudness, and possibly a multiband compressor for targeted dynamic control. Cubase 12’s built-in metering tools, such as LUFS meters, are crucial for ensuring compliance with broadcasting standards and achieving a competitive loudness level.
These tools provide visual representations of the dynamic range and loudness of the mix, allowing for precise adjustments. For instance, using a multiband compressor can help address frequency-specific dynamic issues without affecting the overall balance of the mix.
Workflow for Professional Mix and Master
A typical workflow might begin with gain staging, setting appropriate levels for each track to avoid clipping and maximize headroom. Next, individual tracks are processed with EQ, compression, and other effects to shape their tone and dynamics. Then, aux sends are used to add reverb, delay, and other effects. Once the individual tracks are balanced, the mix is refined as a whole, paying attention to the stereo image, frequency balance, and overall dynamic range.
Finally, mastering involves applying subtle EQ, compression, and limiting to optimize loudness and overall sonic characteristics, adhering to standards such as LUFS targets for streaming platforms. This entire process involves iterative adjustments, constant listening, and a keen ear for detail. For example, a common mastering technique involves using a gentle mastering EQ to address subtle imbalances in the frequency spectrum that might not have been apparent during mixing.
Automation in Cubase 12
Cubase 12’s automation system is a powerful tool for shaping your mixes and adding dynamic movement to your tracks. It goes beyond simple volume and pan adjustments, allowing for intricate control over virtually any parameter in your project. This flexibility makes it a key component for achieving professional-sounding results, whether you’re crafting subtle nuances or dramatic sonic shifts.
Cubase 12 offers several automation methods, each with its own strengths and ideal applications. Understanding these differences is crucial for efficient and effective workflow. The choice often depends on the complexity of the automation, the desired level of precision, and your personal preferences.
Types of Automation in Cubase 12
Cubase 12 provides several automation modes, each suited for different needs. Write automation allows for precise control over individual parameter values at specific points in time. Read automation captures existing parameter movements, providing a non-destructive way to record and edit performances. Lastly, Lane automation offers a visual and intuitive way to handle automation data within dedicated lanes, streamlining complex automation edits.
Each method allows for different levels of control and precision, making it easy to choose the most appropriate approach for the task at hand.
Creating Complex Automation Clips
Let’s say you want to create a complex automation clip for a synth’s filter cutoff frequency. You could use the write automation mode and draw in precise points, creating a gradual increase in the cutoff frequency over a specific section of the track, followed by a sharp decrease, perhaps mimicking a filter sweep effect. Alternatively, you could use the pencil tool to draw smooth curves, adding subtle changes in the cutoff throughout the song.
The possibilities are vast, limited only by your creativity and the precision of the tools. For more complex automation, the use of automation lanes allows for easier visual management and editing. This is particularly helpful when dealing with numerous parameters simultaneously.
Comparison to Other DAWs
Compared to other DAWs, Cubase 12’s automation system stands out for its flexibility and range of options. While many DAWs offer similar write and read automation, Cubase’s lane-based system provides a unique visual approach, particularly useful for managing complex automation across multiple parameters. Some DAWs might prioritize a more streamlined, simplified approach, while others offer similar advanced features but with different user interfaces.
The overall effectiveness of any DAW’s automation system often comes down to user preference and workflow. However, Cubase 12’s comprehensive system, offering write, read, and lane-based automation, caters to a wide range of user needs and skill levels. It allows for both simple and highly complex automation schemes, making it a robust and adaptable tool for any project.
Collaboration Features in Cubase 12
Cubase 12, while primarily a solo artist’s powerhouse, offers some collaborative features designed to streamline workflows for teams. These features aren’t as robust as dedicated collaborative platforms, but they provide useful tools for smaller groups or specific aspects of a project. Think of it as a helpful addition rather than a complete replacement for more comprehensive collaboration software.Cubase 12’s collaboration features center around sharing project files and leveraging its version control system.
The lack of real-time collaboration tools means that teamwork relies on efficient file sharing and a clear understanding of individual responsibilities within the project. This approach works well for projects with distinct roles, like one person handling the composition, another focusing on mixing, and a third on mastering. However, it’s less ideal for simultaneous, real-time editing by multiple users.
Project File Sharing and Version Control
The core of Cubase 12’s collaboration lies in its ability to manage different versions of a project file. This is achieved through standard file saving practices, coupled with good communication among collaborators. Each team member can work on their assigned parts, saving their progress as separate versions. For instance, one collaborator might save their work as “Project_Drums_v1,” another as “Project_Bass_v1,” and so on.
Then, the project leader can integrate these different versions into a master file. This method requires meticulous record-keeping and careful communication to avoid conflicts and overwriting. Regular backups are absolutely crucial to prevent data loss. Think of it like a really organized relay race; each person completes their leg, and then passes the baton (the project file) to the next.
Benefits and Limitations of Cubase 12’s Collaboration Features
The benefit is that it leverages the familiar Cubase environment. Everyone involved works within the same software, avoiding the learning curve associated with different platforms. It’s also relatively simple to implement, requiring only a basic understanding of file management. However, the lack of real-time collaboration is a significant limitation. There’s no built-in system for multiple users to work simultaneously on the same project.
This can lead to version conflicts and delays if not managed effectively. Moreover, communication is paramount; the effectiveness of this method hinges on clear communication and organization among collaborators. Imagine a large orchestral arrangement; coordinating the individual instrument parts using this method would require incredibly meticulous planning and version control.
Step-by-Step Guide to Collaborating on a Cubase 12 Project
- Project Setup and Task Assignment: Before starting, clearly define roles and responsibilities. Who’s handling the drums? The bass? Vocals? Establish a clear communication channel (e.g., Slack, email, or a shared document).
This step is crucial for avoiding conflicts and ensuring everyone knows their part.
- Individual Work: Each collaborator works on their assigned tasks, saving their work regularly with descriptive filenames (e.g., “Project_Vocals_v1,” “Project_Guitars_v2”). Regular backups are essential. This phase is all about individual contributions.
- File Consolidation: Once individual parts are complete, the project leader (or designated person) consolidates all the files. This may involve importing audio files or MIDI tracks from individual project files into a master project file. This step demands careful attention to detail and organization to avoid conflicts.
- Review and Iteration: The consolidated project is reviewed by all collaborators. Feedback is provided, and necessary adjustments are made. This may involve further iterations, with each collaborator working on revisions and resubmitting their updated files.
- Final Mix and Mastering: Once all revisions are complete, the project is finalized, mixed, and mastered.
Cubase 12’s Score Editor
Cubase 12’s Score Editor is a powerful tool for composing and editing music notation directly within the DAW. It seamlessly integrates with the rest of Cubase’s features, allowing for a smooth workflow between MIDI editing, audio production, and traditional notation. This means you can easily switch between working with MIDI data and a visual representation of your musical ideas, making it ideal for composers, arrangers, and anyone who benefits from a visual representation of their music.The Score Editor provides a comprehensive set of functionalities for creating, editing, and manipulating musical notation.
It supports a wide range of musical symbols and notations, allowing for detailed and expressive scores. Beyond basic note input, the editor offers advanced features like chord symbols, lyrics, articulations, and dynamics, enabling users to create professional-quality scores. The editor’s intuitive interface makes navigation and editing straightforward, even for complex scores.
Importing and Exporting Music Notation Files
Cubase 12’s Score Editor supports the import and export of various music notation file formats, including MusicXML (.musicxml) and MusicXML compressed (.mxl). This interoperability allows for seamless collaboration with other notation software and facilitates sharing of scores with other musicians and collaborators. The import process involves selecting the desired file from the file browser and letting Cubase automatically parse and display the notation in the Score Editor.
Exporting follows a similar process, allowing users to save their work in a compatible format for use in other applications. The exact options available for import and export may vary slightly depending on the specific version of Cubase and the format of the file.
Creating a Score from a MIDI Track
Generating a score from an existing MIDI track in Cubase 12 is a simple process. After selecting the MIDI track, users can access the Score Editor and choose the “Create Score from MIDI” option. Cubase will automatically analyze the MIDI data and generate a corresponding musical notation representation. The software intelligently interprets MIDI notes, velocities, and other MIDI data to create a visual representation of the music.
While the automatic transcription is usually accurate, users may need to manually adjust certain aspects of the score for optimal accuracy and readability, particularly in complex musical passages. This feature greatly simplifies the process of creating scores from existing MIDI compositions, saving considerable time and effort.
Troubleshooting Common Cubase 12 Issues
Okay, so you’re diving into Cubase 12, and things aren’t quite going as smoothly as you’d hoped? Don’t worry, it happens to the best of us. Even seasoned pros run into snags sometimes. This section covers some of the most frequently reported issues and offers straightforward solutions to get you back on track. Think of this as your quick-fix guide to conquering those Cubase 12 hiccups.
Common Cubase 12 Problems and Solutions
Cubase 12, while powerful, can sometimes present challenges. Below is a table summarizing five common problems, their solutions, likely causes, and preventative measures. Understanding the root cause can often help you avoid these issues in the future.
| Problem | Solution | Cause | Prevention |
|---|---|---|---|
| High CPU/Latency Issues | Reduce buffer size (in the Devices menu), close unnecessary applications, disable unused plugins, consolidate tracks, use lower sample rate (e.g., 44.1kHz instead of 96kHz). Consider upgrading your computer’s RAM and processor if persistently problematic. | Too many plugins running simultaneously, large buffer size, insufficient RAM, overloaded CPU, high sample rate. | Regularly monitor CPU and RAM usage. Use only necessary plugins. Optimize your project’s sample rate and buffer size for your system’s capabilities. |
| Audio Crackling or Dropping Out | Check audio driver settings, ensure sufficient disk space, reduce buffer size (in the Devices menu), close unnecessary applications, rescan your audio interfaces, troubleshoot driver conflicts. | Driver issues, insufficient disk space, overloaded CPU, buffer underrun, hardware problems (e.g., faulty audio interface). | Maintain ample free hard drive space. Regularly update audio drivers. Monitor CPU and disk usage. Use a reliable audio interface. |
| Plugin Conflicts or Crashes | Update plugins to their latest versions, check plugin compatibility with Cubase 12, disable problematic plugins one by one to identify the culprit, reinstall the problematic plugin, try a different plugin that offers similar functionality. Contact the plugin developer if problems persist. | Incompatible plugins, outdated plugins, corrupted plugin files, resource conflicts. | Regularly update your plugins. Only use compatible plugins. Maintain organized plugin folders. |
| Project File Corruption | Try opening the project in a previous version of Cubase (if possible). Create a backup of your project regularly. Consider using a cloud-based storage service. | Sudden power loss, improper shutdown, software glitches, hard drive errors. | Regularly save your work (using the autosave feature). Create backups of your projects in multiple locations. Use a reliable power supply and UPS. |
| MIDI Input/Output Problems | Check MIDI cable connections, verify MIDI port settings in Cubase and your MIDI device, update MIDI device drivers, ensure your MIDI device is correctly configured and powered. | Faulty MIDI cables, incorrect MIDI port assignments, driver issues, power problems with the MIDI device. | Regularly check MIDI cable connections. Ensure correct MIDI port settings. Update drivers for your MIDI devices. |
Cubase 12’s Export Options
Exporting your meticulously crafted project in Cubase 12 is the final, crucial step before sharing your music with the world. Getting this right ensures your hard work sounds its best on different platforms and devices. Choosing the right export settings isn’t just about clicking a button; it’s about understanding the nuances of different audio formats and their implications for file size, audio quality, and compatibility.Exporting your audio from Cubase 12 involves several options, each with its own strengths and weaknesses.
Understanding these differences will help you achieve the best possible results for your specific needs, whether you’re aiming for pristine quality for a high-resolution release or a smaller file size for online streaming.
Audio File Formats
Cubase 12 offers a variety of audio file formats for export, each catering to different needs. The most common include WAV, AIFF, MP3, and AAC. Choosing the right format depends on factors such as desired audio quality, file size, and compatibility with various platforms.
- WAV: Lossless format, meaning no audio data is lost during encoding. This results in the highest audio quality but also the largest file size. Ideal for archiving your master recordings or for distribution to mastering engineers.
- AIFF: Another lossless format, similar to WAV, offering high quality but large file sizes. Often preferred on macOS systems.
- MP3: A lossy format, meaning some audio data is discarded during compression. This results in smaller file sizes compared to WAV or AIFF, but with a potential reduction in audio quality. Widely compatible and commonly used for online streaming and distribution.
- AAC: Another lossy format, often considered superior to MP3 in terms of audio quality at similar bitrates. Also widely used for online streaming and distribution, particularly on Apple devices.
Sample Rate and Bit Depth
These settings directly impact the audio quality and file size of your exported audio.
- Sample Rate: This determines how many audio samples are taken per second. Higher sample rates (e.g., 44.1 kHz, 48 kHz, 96 kHz, 192 kHz) result in higher fidelity but larger file sizes. 44.1 kHz is the standard for CDs, while higher rates are often used for high-resolution audio.
- Bit Depth: This determines the precision of each audio sample. Higher bit depths (e.g., 16-bit, 24-bit) result in a wider dynamic range and less quantization noise, leading to higher fidelity. 24-bit is commonly used for professional audio production.
Export Settings for Different Platforms
Optimizing your export settings for different distribution platforms ensures your music sounds its best on various devices and services.
- Streaming Services (Spotify, Apple Music, etc.): For streaming platforms, a high-quality lossy format like AAC (256 kbps or higher) is usually recommended. This balances audio quality with efficient file sizes for optimal streaming performance. A sample rate of 44.1 kHz or 48 kHz is typically sufficient.
- Download Stores (iTunes, Bandcamp, etc.): For download stores, offering both lossless (WAV or AIFF) and high-quality lossy (AAC 256 kbps) options provides flexibility for listeners. This allows users to choose between maximum fidelity and smaller file sizes.
- CDs: For CD mastering, a WAV file with a sample rate of 44.1 kHz and a bit depth of 16-bit is the standard.
- High-Resolution Audio Distribution: For high-resolution audio distribution, lossless formats like WAV or AIFF at sample rates of 96 kHz or 192 kHz and bit depths of 24-bit are used.
Closing Summary
Cubase 12 represents a significant leap forward in digital audio workstation technology, offering a robust and versatile platform for musicians of all levels. By understanding its system requirements, mastering its new features, and optimizing its workflow, you can unlock unparalleled creative possibilities. This guide has aimed to provide a comprehensive overview, equipping you with the tools and knowledge to confidently navigate the world of Cubase 12 and create your best music yet.
So, fire up Cubase 12, and let’s make some noise!
User Queries
Is Cubase 12 compatible with my older plugins?
Most likely, yes! Cubase 12 boasts excellent backward compatibility, but it’s always a good idea to check the individual plugin’s system requirements.
How much RAM do I need for Cubase 12?
The recommended RAM is 16GB, but for larger projects, 32GB or more is highly recommended. Low RAM can lead to sluggish performance and crashes.
Can I use Cubase 12 on a laptop?
Absolutely! Just make sure your laptop meets the minimum system requirements, paying close attention to CPU power and RAM. A dedicated graphics card will also improve performance.
What’s the difference between Cubase 12 Pro and Cubase 12 Elements?
Cubase 12 Pro offers a more comprehensive feature set, including advanced mixing tools, more VST instruments, and additional collaboration features, while Elements is a more streamlined version ideal for beginners.
Where can I find Cubase 12 tutorials?
Steinberg’s website offers official tutorials, and YouTube is packed with user-created videos covering various aspects of Cubase 12.