Blender animation: It’s more than just software; it’s a gateway to creating stunning visuals, from quirky shorts to realistic character animations. This guide dives deep into the world of Blender, exploring its powerful features and versatile animation techniques. We’ll cover everything from the basics of rigging and keyframing to advanced concepts like physics simulations and motion capture, equipping you with the skills to bring your creative visions to life.
Whether you’re a complete beginner or have some experience with 3D animation software, you’ll find valuable insights and practical tips throughout this exploration. We’ll examine the workflow, comparing Blender’s capabilities to industry standards and showing you how to optimize your animation process for efficiency and quality. Get ready to unlock the full potential of Blender and transform your ideas into captivating animations!
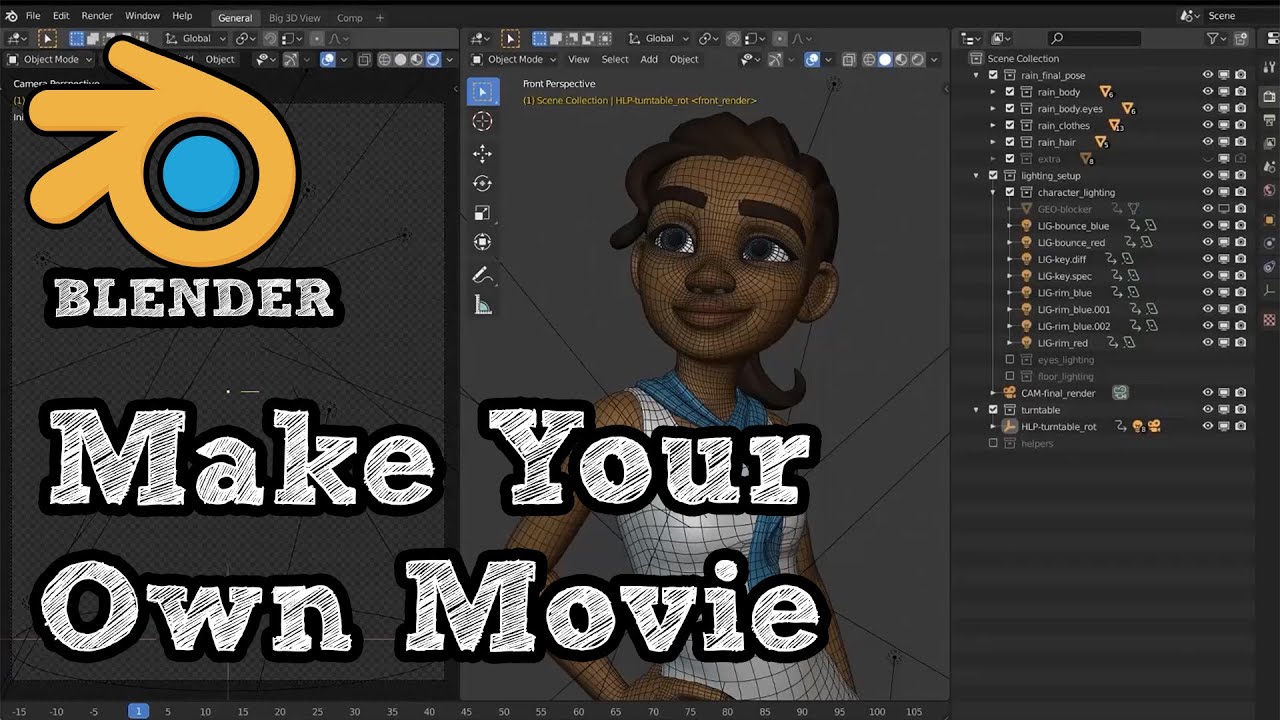
Blender Animation Software Overview
Blender is a free and open-source 3D creation suite, incredibly powerful for animation. It boasts a comprehensive set of tools, from modeling and rigging to animation, simulation, compositing, and rendering, all within a single, integrated package. This makes it a compelling alternative to expensive commercial software, particularly for students, hobbyists, and smaller studios.Blender’s animation workflow is remarkably efficient due to its integrated nature.
The process typically begins with modeling, where you create the 3D assets. This is followed by rigging, which involves creating a skeleton and connecting it to the model, allowing for realistic movement. Then comes animation, using keyframes to define poses at different points in time. After animation, you might add modifiers for things like cloth simulation or particle effects.
Finally, the scene is rendered, creating the final output. This streamlined process minimizes the need for importing and exporting files between different applications, leading to faster turnaround times.
Blender’s Core Animation Features
Blender offers a robust set of tools specifically designed for animation. Its keyframing system is intuitive and allows for precise control over object movement, transformations, and material properties. It also includes powerful tools for character animation, such as inverse kinematics (IK) for natural-looking limb movements and realistic facial animation with shape keys. Furthermore, Blender’s physics engine allows for realistic simulations of cloth, fluids, smoke, and rigid bodies, adding another layer of complexity and realism to animations.
The Grease Pencil feature allows for 2D animation directly within the 3D environment, enabling quick sketches and storyboarding.
Blender’s Animation Workflow
The typical animation workflow in Blender begins with creating or importing 3D models. These models are then rigged using armatures, which are skeletal structures that allow for pose manipulation. Animators set keyframes to define the character’s poses at specific points in time. Blender’s powerful constraint system allows for complex movements to be created easily, for example, linking a character’s hand to an object they’re holding.
The next step usually involves adding details like materials, textures, and lighting. Finally, the scene is rendered using Blender’s Cycles or Eevee render engines, generating the final animation. The entire process, from modeling to rendering, can be completed within the same software, eliminating the need for external programs.
Comparison to Industry-Standard Software, Blender animation
While Blender is a powerful and versatile animation package, it’s important to acknowledge its differences from industry-standard software like Maya and 3ds Max. These commercial packages often boast more polished user interfaces and extensive plugin ecosystems, offering specialized tools not found in Blender. However, Blender is rapidly catching up, with its community consistently developing and improving its functionality. Blender’s strengths lie in its open-source nature, making it accessible to everyone, and its impressive range of features considering its free price point.
Many professionals are successfully using Blender for high-quality animation projects, demonstrating its viability as a serious alternative. The choice between Blender and commercial software often comes down to budget, specific feature needs, and familiarity with the interface. For example, a large studio working on a high-budget film might prefer the established workflow and specialized tools of Maya, while an independent animator might find Blender’s accessibility and free nature more appealing.
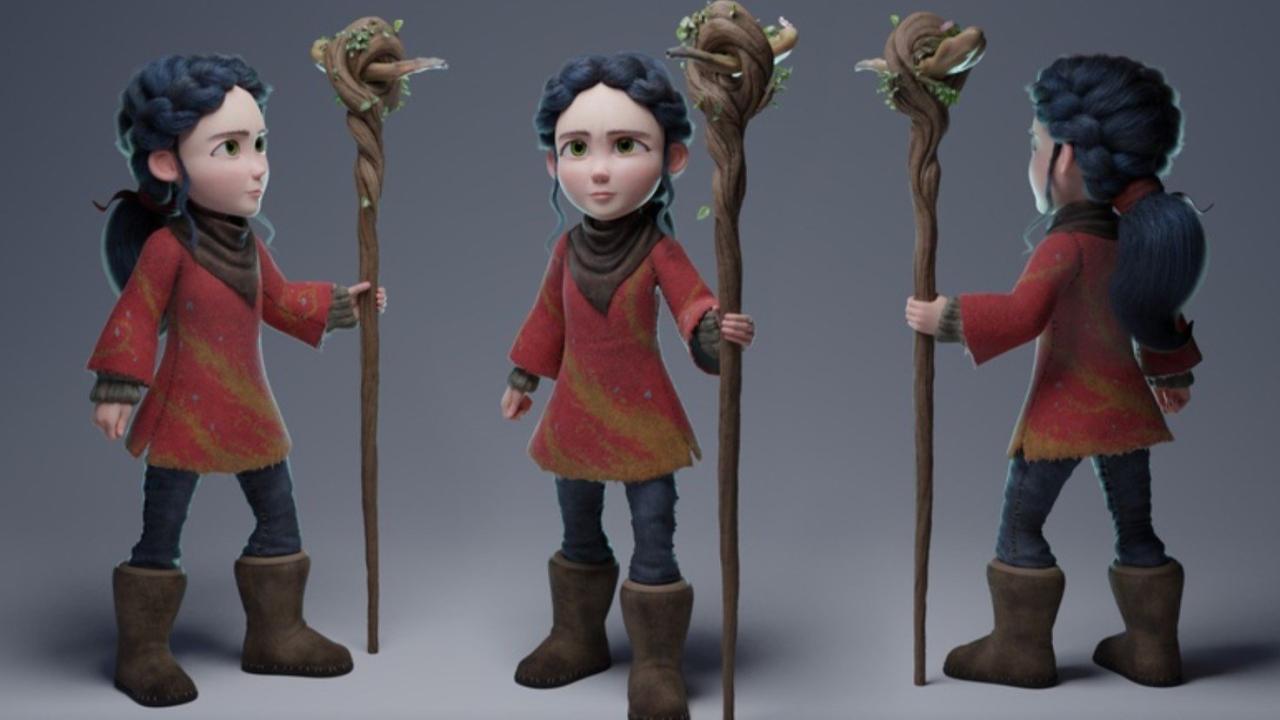
Character Animation Techniques in Blender
Okay, so we’ve covered the basics of Blender, and now it’s time to dive into the really fun stuff: animating characters! This is where Blender’s power really shines, letting you bring your creations to life in a variety of styles. We’ll explore the rigging process, different animation styles, and the core tools you’ll use to make your characters move.
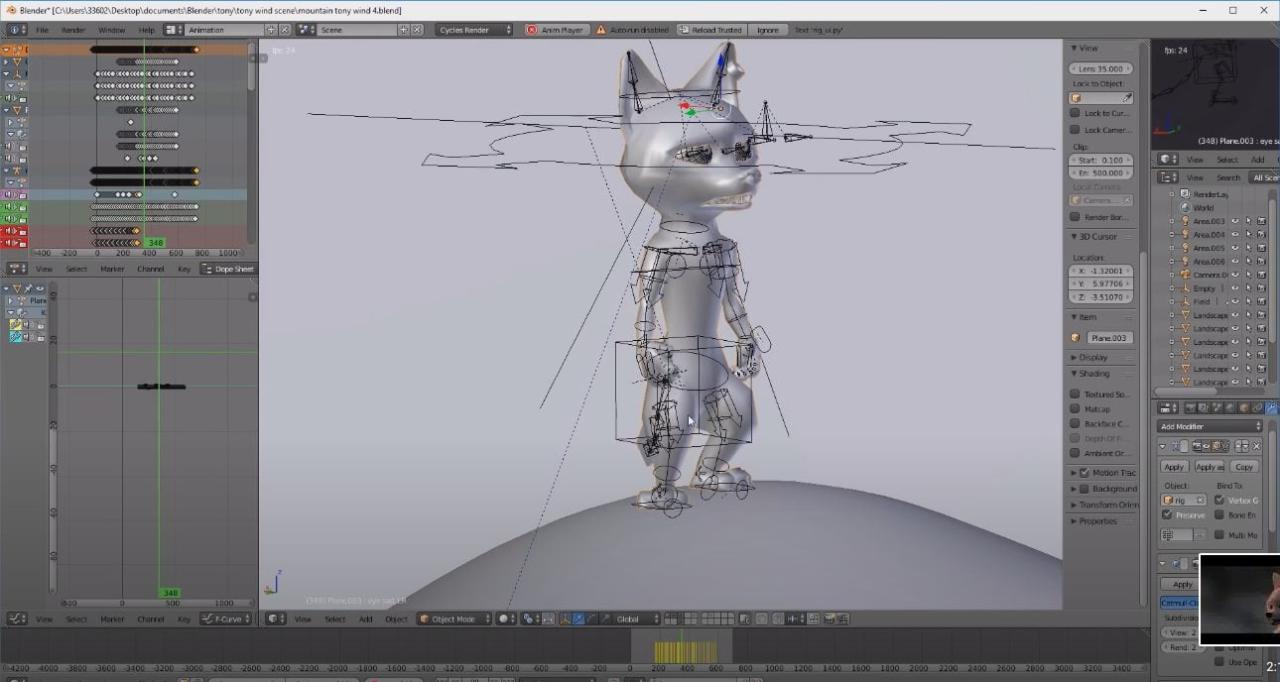
Rigging is basically building a skeleton inside your character model. This skeleton lets you control the character’s movements through manipulating its bones. Think of it like a puppet master, but instead of strings, you’re using Blender’s intuitive interface. Once rigged, you can pose and animate the character without manually adjusting every vertex.
Character Rigging in Blender
Rigging a character involves several steps. First, you need a well-modeled character. Then, you add armature bones, strategically placing them to mimic the character’s skeletal structure. The bones are then parented to the mesh, creating a connection between the bones and the character’s geometry. This allows the mesh to deform realistically as you manipulate the bones.
Weight painting is a crucial step here; it determines how much each bone influences the surrounding mesh. Proper weight painting ensures smooth deformations and avoids unnatural stretching or clipping. Finally, you can add constraints to further refine your rig’s functionality, allowing for more complex movements and interactions. For instance, you might use an IK (Inverse Kinematics) constraint to control a character’s leg movement more naturally, or a copy rotation constraint to synchronize the movement of two parts of the body.
Animation Styles in Blender
Blender allows for a wide range of animation styles. Let’s look at a couple of popular ones.
Realistic animation strives for photorealism. Think of high-budget movies or video games. The movement is fluid, natural, and often incorporates physics simulations for realistic cloth and hair. Achieving this style requires meticulous attention to detail, understanding of human anatomy and physics, and often, the use of advanced techniques like motion capture.
Stylized animation, on the other hand, prioritizes artistic expression over strict realism. Think cartoons, anime, or video games with a unique visual style. Movement can be exaggerated, bouncy, or even deliberately unnatural. This style often involves simplified character designs and animation techniques to achieve a specific aesthetic. For example, you might use exaggerated squash and stretch to emphasize the character’s movements.
Keyframes and Constraints in Character Animation
Keyframes are the foundation of animation in Blender. They’re essentially snapshots of your character’s pose at specific points in time. Blender interpolates (smoothly transitions) between these keyframes to create the illusion of movement. By setting keyframes for different poses, you define the character’s actions and movements. Constraints, as mentioned earlier, add another layer of control.
They automatically adjust the position or rotation of bones based on defined rules, streamlining the animation process and allowing for complex movements without the need for manual keyframing for every detail. For instance, an “IK constraint” on a leg allows you to pose the foot, and the knee and hip will automatically adjust to create a realistic leg pose.
Similarly, a “copy rotation” constraint could be used to make a character’s head follow the movement of its body.
Environment and Object Animation in Blender
Bringing your animations to life involves more than just character movement; it’s about crafting believable and engaging environments and populating them with dynamic objects. This section explores how Blender’s tools can be used to create stunning visuals and fluid object animation, transforming your project from static to spectacular. We’ll cover techniques for creating realistic and stylized environments, animating objects, and manipulating cameras to achieve the desired cinematic effect.
Blender offers a robust suite of tools for environmental creation, from simple procedural generation to intricate manual modeling. For realistic environments, consider using high-resolution textures, detailed modeling, and advanced lighting techniques to achieve photorealism. Stylized environments, on the other hand, offer a chance to explore artistic freedom, allowing for exaggerated proportions, vibrant color palettes, and unique visual styles.
The choice depends entirely on the desired aesthetic of your animation.
Creating Realistic and Stylized Environments
Creating convincing environments is key to immersive animation. For realistic environments, start by building your scene with accurate modeling. Think about the scale of your objects and the relationships between them. Next, incorporate high-resolution textures to add detail and realism. For example, a cobblestone street would benefit from a texture showing individual stones with variations in color and wear.
Finally, employ realistic lighting to enhance the mood and depth of the scene. Consider using HDRI images as environment maps to simulate realistic lighting and reflections. Stylized environments, conversely, allow for greater artistic license. You can utilize simplified shapes, bold colors, and unique materials to create a distinct visual style. Think of the vibrant colors and exaggerated proportions often seen in cartoons or video games.
The choice between realism and stylization depends on your animation’s overall aesthetic.
Animating Objects and Cameras
Animating objects in Blender involves using keyframes to define their position, rotation, and scale over time. Simple animations might involve a ball bouncing, while more complex animations could include intricate machinery or character interactions with objects. The key is to create smooth and believable movement. For example, a bouncing ball should accelerate downwards, compress slightly upon impact, and then rebound upwards, gradually losing energy.
Camera animation is equally important for establishing shots, guiding the viewer’s attention, and creating dynamic viewpoints. You can use keyframes to control the camera’s position, rotation, and focal length, creating smooth transitions between different shots. Techniques like camera tracking and dolly zooms can further enhance the cinematic quality of your animation.
Animating a Simple Scene: A Step-by-Step Guide
Let’s animate a simple scene featuring a bouncing ball and a moving camera.
- Scene Setup: Create a simple cube representing the ground plane. Add a UV sphere to represent the ball. Position the ball above the ground.
- Ball Animation: Select the ball. In the timeline, insert a keyframe at frame 1 showing the ball’s initial position. Move the timeline cursor to frame 20, then move the ball downwards, creating a keyframe. Continue adding keyframes to simulate a bounce, gradually reducing the height of each bounce to show energy loss. Experiment with different keyframe interpolation types (linear, bezier, etc.) to fine-tune the bounce’s smoothness.
- Camera Animation: Add a camera to the scene. Position it to view the bouncing ball. Insert a keyframe at frame 1. Move the timeline cursor to frame 30, move the camera slightly to the side, and create another keyframe. This creates a simple panning effect as the ball bounces.
- Rendering: Render the animation. Experiment with different rendering settings to achieve the desired quality and performance. Consider using Cycles for high-quality rendering or Eevee for faster renders during testing.
Lighting and Rendering for Blender Animations
Lighting and rendering are crucial aspects of creating compelling Blender animations. A well-lit scene can dramatically enhance the mood, realism, and overall visual appeal of your animation, while the choice of render engine significantly impacts rendering time and final image quality. This section explores different lighting techniques and render engines available in Blender, along with a practical example of designing a lighting setup.
Blender offers a wide array of lighting options, from simple point lights to complex area lights and HDRI environments. Understanding the properties and behaviors of these light sources is key to achieving the desired look for your animation. The choice of render engine will further influence the final rendered image, affecting factors such as rendering speed, realism, and the types of effects achievable.
Blender Lighting Techniques
Blender provides a diverse set of lighting tools. Point lights, for example, emit light equally in all directions, ideal for simple illumination or highlighting specific areas. Spotlights, on the other hand, emit light within a cone shape, useful for creating focused beams of light, like a flashlight or a spotlight on a stage. Area lights, such as planes or rectangular lights, simulate more realistic light sources by emitting light from a surface area, creating softer shadows and more natural illumination.
Sun lamps mimic the sun’s light, providing a directional light source with realistic shadows. Finally, HDRI (High Dynamic Range Imaging) environments use a spherical image to map realistic lighting and reflections onto the scene, greatly enhancing realism. The use of light modifiers like shadows, caustics, and volumetric lighting can add further depth and complexity to the scene.
Render Engine Impact on Animation Quality
Blender offers several render engines, each with its strengths and weaknesses. Cycles, Blender’s internal path-tracing engine, is known for its photorealistic rendering capabilities, handling global illumination and complex materials exceptionally well. However, it can be computationally intensive, resulting in longer render times. Eevee, Blender’s real-time render engine, is significantly faster than Cycles, making it ideal for quick previews and interactive rendering.
While Eevee’s rendering quality is generally lower than Cycles, its speed allows for faster iteration and experimentation during the animation process. Workbench is Blender’s fastest render engine, prioritizing speed over visual fidelity, useful for wireframe views and quick checks of the scene. The choice of render engine depends heavily on the project’s needs, balancing rendering quality with the available time and computational resources.
Lighting Setup Design: A Nighttime City Scene
Let’s design a lighting setup for a nighttime city scene. Our goal is to create a moody, atmospheric environment with a focus on highlighting key architectural features. We will use Cycles as our render engine for its photorealism.
The primary light source will be a distant, slightly desaturated moonlight source, simulated using a Sun lamp positioned high in the sky. Its intensity will be relatively low to maintain a dark, nighttime feel. To create the ambiance of a city at night, we’ll use several smaller area lights to represent streetlights and building lights. These lights will be warmer in color temperature than the moonlight, providing contrast and highlighting key areas.
We will strategically place these area lights along streets and on buildings, ensuring they cast realistic shadows and illuminate the environment in a believable manner. Finally, to further enhance the realism, we’ll incorporate an HDRI environment map featuring a night sky with subtle stars and city glow. This HDRI map will subtly illuminate the scene and provide realistic reflections on surfaces like wet streets or glass buildings.
The use of subtle volumetric lighting around the streetlights can add to the atmosphere, simulating light scattering in the air. This multi-layered approach to lighting will result in a visually appealing and realistic nighttime city scene, effectively conveying the atmosphere and mood of the animation.
Blender Animation Workflow Optimization
Optimizing your Blender animation workflow is crucial for efficient production and preventing frustrating delays. A streamlined process allows you to focus on creative aspects rather than battling technical hurdles. Understanding common bottlenecks and implementing effective strategies will significantly improve your overall animation experience.Common bottlenecks in Blender animation often stem from managing complex scenes, inefficient rendering practices, and a disorganized workflow.
These issues can lead to longer render times, frequent crashes, and a generally frustrating workflow. Addressing these problems proactively results in smoother animation creation and faster turnaround times.
Scene Complexity Optimization for Faster Rendering
High polygon counts, excessive textures, and overly complex lighting setups are major contributors to slow render times. Optimizing your scene involves strategically reducing unnecessary detail and employing techniques to improve rendering efficiency. For instance, using proxy objects during animation can significantly reduce render times. Proxy objects are low-resolution representations of complex models, allowing for faster animation and interaction.
Once the animation is finalized, you can switch back to the high-resolution models for final rendering. Another example is using optimized materials. Using simpler shaders and textures, avoiding overly detailed normal maps, and utilizing procedural textures can reduce rendering load substantially. A project using a complex character model with thousands of polygons could benefit greatly from this, perhaps cutting rendering time by 50% or more depending on the specific complexity reduction.
Workflow Optimization for Increased Efficiency
A well-organized workflow is key to efficient animation production. Effective organization can dramatically reduce time spent searching for assets or resolving technical issues. Implementing a robust file management system is crucial; keeping assets organized in a logical directory structure makes locating and managing files easier. This could involve separating models, textures, animations, and renders into distinct folders.
Furthermore, using Blender’s layer system effectively can help manage complex scenes. Separating different parts of your scene into layers helps to isolate and work on specific areas without affecting others, reducing the chances of accidental modifications. Using version control, such as Git, allows you to track changes, revert to previous versions, and collaborate more efficiently with others.
This is particularly useful in team projects where multiple individuals are working on the same animation file.
Utilizing Blender’s Built-in Optimization Tools
Blender provides several built-in tools designed to optimize your workflow and improve performance. For example, using the “Artikelr” effectively allows for quick access to all scene objects, making organization and selection much faster. Understanding and utilizing Blender’s cache system allows for faster playback and manipulation of animations. The use of viewport rendering options allows for a faster preview of the final render without the full render being computed, speeding up the iterative process.
This can be especially beneficial when working with complex lighting or effects. Finally, regular scene clean-up is vital. Removing unnecessary objects, deleting unused materials, and optimizing meshes can significantly improve performance and prevent memory issues.
Advanced Animation Techniques in Blender

Blender’s power truly shines when you delve into its advanced animation features. Beyond the basics of keyframing, Blender offers a robust suite of tools for creating incredibly realistic and complex animations, pushing the boundaries of what’s possible with traditional animation methods. This section explores some of these advanced techniques, focusing on physics simulations and motion capture integration.
Physics Simulations in Blender
Blender’s physics engine allows animators to simulate real-world phenomena, adding a level of realism often unattainable through manual keyframing. This significantly reduces workload and adds a level of unpredictable dynamism that’s hard to replicate otherwise. The most commonly used simulations are cloth and fluid simulations. Cloth simulation allows for the realistic movement of fabric, responding to gravity, wind, and collisions with other objects.
Imagine a flag flapping in the wind, or a character’s flowing cape – all achievable with minimal manual intervention. Fluid simulations, on the other hand, deal with the behavior of liquids and gases, allowing for the creation of realistic water, smoke, or fire effects. The parameters for both simulations are highly customizable, allowing for fine-grained control over the resulting animation.
For example, you can adjust the density, viscosity, and surface tension of a fluid simulation to achieve a wide range of effects, from a gentle stream to a raging torrent. Similarly, cloth simulations allow you to control factors such as stiffness, damping, and air resistance, creating realistic wrinkles and folds in the fabric.
Motion Capture Data in Blender
Motion capture (mocap) data provides a powerful way to bring realism and fluidity to character animation. Mocap involves capturing the movement of a real person or object using specialized sensors, and then translating that data into a 3D animation. Blender offers excellent support for importing and utilizing mocap data, typically in the form of FBX files. Once imported, the mocap data can be directly applied to a rigged character, giving it incredibly lifelike movements.
This significantly speeds up the animation process, particularly for complex actions like running, jumping, or fighting. However, it’s important to note that mocap data often requires some level of cleaning and retargeting to fit perfectly onto your Blender character rig. This involves adjusting the animation to match the specific bone structure and proportions of your character model. Despite the occasional post-processing, the time saved compared to manual animation is substantial, especially for complex sequences.
Creating a Complex Animation Using Advanced Techniques
Let’s consider a scenario: animating a scene where a character, wearing a flowing cape, jumps off a cliff, narrowly avoiding a waterfall cascading down a rocky face. This scene requires the integration of multiple advanced techniques. First, the character’s jump would likely benefit from mocap data to ensure a realistic and physically accurate motion. The cape would utilize cloth simulation, interacting with the character’s movements and the surrounding air currents.
The waterfall would involve a fluid simulation, requiring careful adjustments to parameters like viscosity and turbulence to achieve the desired visual effect. Finally, the environment – the cliff face and surrounding rocks – would be meticulously modeled and textured, with lighting and rendering techniques employed to enhance realism. The interaction between the character, cape, and waterfall, all governed by different physics simulations, would create a visually stunning and dynamically engaging animation.
The final render would showcase the seamless integration of these advanced techniques, resulting in a highly realistic and visually impressive final product.
Blender Animation Tutorials and Resources
Finding the right Blender animation tutorials can feel like navigating a vast, digital ocean. Luckily, there are many excellent resources available, catering to all skill levels, from complete beginners to seasoned animators looking to refine their techniques. This section provides a curated list of reputable online platforms and a comparison of popular tutorials to help you chart your course.
Effective learning hinges on finding resources that match your learning style and current skill level. Some learners prefer concise, project-based tutorials, while others benefit from comprehensive courses that cover the fundamentals in detail. The key is to find a learning path that keeps you engaged and motivated.
Reputable Online Resources for Blender Animation
The internet offers a plethora of Blender animation tutorials. However, separating the gold from the dross can be challenging. The following list focuses on established platforms and individual creators known for their high-quality content and clear explanations.
- Blender Guru: Andrew Price’s channel is legendary for its clear, step-by-step tutorials, often focusing on creating complete projects. He’s excellent for beginners.
- CG Cookie: Offers a mix of free and paid courses, covering a wide range of Blender topics, including animation. They provide structured learning paths.
- YouTube Channels (Various): Many talented individual creators offer high-quality Blender animation tutorials on YouTube. Look for channels with consistent uploads, positive viewer feedback, and a clear teaching style. Be sure to check the upload dates to ensure the tutorials are up-to-date with the latest Blender versions.
- Udemy and Skillshare: These platforms host numerous Blender animation courses, often taught by experienced professionals. These courses can be more structured and comprehensive than YouTube videos, but usually come at a cost.
- Blender’s Official Documentation: While not strictly a tutorial site, Blender’s official documentation is an invaluable resource for understanding the software’s features and functionalities. It’s a great place to look up specific techniques or troubleshoot problems.
Comparison of Blender Animation Tutorials
Choosing the right tutorial depends on your skill level and specific learning goals. This table compares some popular tutorial styles.
| Tutorial Type | Skill Level | Focus | Pros |
|---|---|---|---|
| Short, Project-Based Tutorials (e.g., YouTube shorts) | Beginner to Intermediate | Specific techniques or small projects | Quick to learn, focused, good for skill reinforcement |
| Comprehensive Courses (e.g., Udemy, CG Cookie) | Beginner to Advanced | Broad overview of animation principles and techniques | Structured learning, in-depth knowledge, often includes project work |
| Advanced Technique Tutorials (e.g., specialized YouTube channels) | Intermediate to Advanced | Specific advanced techniques like rigging, cloth simulation, or character animation | Deep dive into complex topics, useful for specializing |
| Blender Guru-style Tutorials | Beginner to Intermediate | Complete project creation, often with a focus on character animation | Excellent for learning a process from start to finish |
Community and Collaboration in Blender Animation
Blender’s open-source nature fosters a vibrant and supportive community crucial to its success. This collaborative spirit extends significantly to the world of Blender animation, providing a wealth of resources, assistance, and opportunities for growth. The community plays a vital role in knowledge sharing, project development, and the overall evolution of Blender animation techniques.The online communities surrounding Blender are invaluable for sharing animation knowledge.
Forums, social media groups, and dedicated websites serve as hubs for exchanging tips, tricks, tutorials, and feedback. Experienced animators readily share their expertise, helping newcomers navigate the software and refine their skills. These platforms also facilitate the sharing of assets, such as models, rigs, and textures, saving animators time and effort. Furthermore, these online spaces often host challenges and competitions, providing opportunities for animators to showcase their work and receive constructive criticism.
Online Communities as Knowledge Sharing Platforms
Online forums like Blender Artists and the official Blender community website provide extensive resources for Blender animators. These platforms allow users to post questions, share their work, and receive feedback from a global network of users. The collective knowledge base generated by these communities is invaluable for both beginners and experienced animators. Specific threads often delve into intricate animation techniques, troubleshooting common problems, and sharing tips for optimizing workflows.
The constant exchange of information and ideas accelerates the learning process and drives innovation within the Blender animation community. For example, a user struggling with a complex rigging problem might find a detailed solution within a forum thread, complete with explanations and illustrative images (imagine a detailed thread showing step-by-step screenshots of rigging a character’s arm, highlighting specific settings and techniques).
This peer-to-peer support is a defining characteristic of the Blender community and a significant factor in its continued growth.
Collaboration Tools for Team-Based Animation Projects
Several tools and platforms facilitate collaboration on team-based Blender animation projects. Version control systems like Git, often integrated with platforms like GitHub, allow multiple animators to work on the same project simultaneously without overwriting each other’s work. Cloud-based storage services enable seamless file sharing and access for team members, regardless of their geographical location. Project management software, such as Trello or Asana, can be used to track progress, assign tasks, and maintain communication within the team.
Communication platforms like Slack or Discord provide a centralized space for quick discussions and updates. These tools are essential for managing complex animation projects, ensuring efficient workflows, and maintaining clear communication amongst team members. For instance, imagine a team using Git to manage their Blender project files. Each animator can work on their assigned tasks, and Git tracks all changes, allowing them to merge their work seamlessly and resolve any conflicts that may arise.
Examples of Successful Collaborative Blender Animation Projects
Many successful collaborative Blender animation projects demonstrate the power of community and teamwork. While specific project names and details are readily available online, citing specific examples requires detailed knowledge of those projects’ internal workings and access to verifiable information regarding collaboration processes. However, numerous open-source projects, short films, and even feature-length animations demonstrate the collaborative potential of the Blender community.
These projects often involve a diverse team of animators, modelers, riggers, texture artists, and compositors, all contributing their skills to a shared vision. The success of these collaborative efforts highlights the value of community engagement and the power of collaborative tools in realizing ambitious animation projects. For example, consider a hypothetical student film project where students from different specializations (modeling, animation, lighting, etc.) collaborate using cloud-based storage and project management software to create a compelling short film.
This demonstrates a real-world scenario of how collaborative tools enable the successful completion of complex projects.
Blender Animation for Different Applications
Blender’s versatility makes it a powerful tool across various animation fields, each demanding unique stylistic and technical approaches. From the photorealistic demands of film to the stylized needs of video games and the punchy brevity of advertising, understanding these differences is crucial for effective animation production. Adapting techniques hinges on balancing artistic vision with the technical limitations and target audience of each medium.Blender animation finds extensive use in film, video games, and advertising, each presenting unique challenges and opportunities.
The stylistic choices and technical considerations vary greatly depending on the intended platform and audience.
Film Animation with Blender
Film animation often prioritizes photorealism and emotional depth. Think of the intricate character animation in a Pixar film or the detailed environments of a high-budget fantasy epic. To achieve this level of realism in Blender, animators rely heavily on advanced techniques like realistic skin shaders, physically based rendering (PBR), and complex rigging for nuanced character movements. The workflow typically involves a large team collaborating on modeling, texturing, rigging, animation, lighting, and compositing, often spanning months or even years of production.
High-end rendering techniques, like path tracing, are employed to achieve the desired photorealistic quality. The narrative structure is usually complex and emotionally driven, requiring a strong understanding of storytelling and character development. Examples include short films created using Blender that have been successfully screened at film festivals.
Video Game Animation with Blender
Video game animation, in contrast, emphasizes efficiency and stylized visuals. While realism plays a role in some AAA titles, many games prioritize a distinct artistic style over photorealism. This often means using simpler character rigs and animation techniques to ensure performance optimization within the game engine. The animation itself needs to be loop-able and adaptable to various gameplay scenarios.
Blender animation is awesome, especially when you need to create really detailed characters. But sometimes, sketching out initial designs in a dedicated drawing program is way easier; check out some great options at this site for drawing apps to help you prep. Then, you can import those polished drawings into Blender and start animating! It’s a killer workflow for bringing your ideas to life.
Low-poly modeling and optimized textures are frequently employed to maintain frame rates. Stylized animation, often with exaggerated movements and expressions, is common. Consider the unique animation style in games like “Cuphead” or “Borderlands,” which use distinct visual styles that complement the game’s overall aesthetic.
Advertising Animation with Blender
Advertising animation demands brevity and impact. The goal is to grab attention and convey a message quickly and effectively. Animation styles range from photorealistic to highly stylized, depending on the product and target audience. The animation often focuses on a single key message or selling point, and the length is typically short – often just a few seconds.
Efficient workflows are essential to meet tight deadlines and budgets. Emphasis is placed on clear visual communication and a strong call to action. Think of the short, dynamic animations used in commercials for cars, food products, or technology. The stylistic choices are heavily influenced by branding guidelines and the overall marketing campaign.
Closure
From basic rigging to complex physics simulations, Blender animation offers a powerful and versatile toolkit for creators of all skill levels. Mastering the workflow, understanding lighting and rendering techniques, and leveraging online resources and community support are key to success. So grab your mouse, fire up Blender, and unleash your creativity – the world of animation awaits!
General Inquiries: Blender Animation
Is Blender free to use?
Yes, Blender is completely free and open-source software.
What’s the learning curve like?
Blender has a steep learning curve initially, but tons of free tutorials are available online to help you get started.
What kind of computer do I need?
A decent computer with a dedicated graphics card is recommended, especially for complex animations. Specs depend on the complexity of your projects.
Can I use Blender for professional work?
Absolutely! Many professionals use Blender for film, game development, and advertising. Its capabilities are on par with commercial software.
Where can I find help if I get stuck?
The Blender community is incredibly active and supportive. Check out the Blender Artists forum and YouTube for help.