DIY chalkboard paint allows you to transform ordinary surfaces into personalized masterpieces. Whether you’re a seasoned crafter or a beginner, this guide provides a comprehensive overview of crafting your own chalkboard paint, from ingredient selection to application techniques.
With the right ingredients and a bit of patience, you can create a durable and versatile chalkboard paint that can be used for a variety of projects, from decorating your home to creating unique gifts.
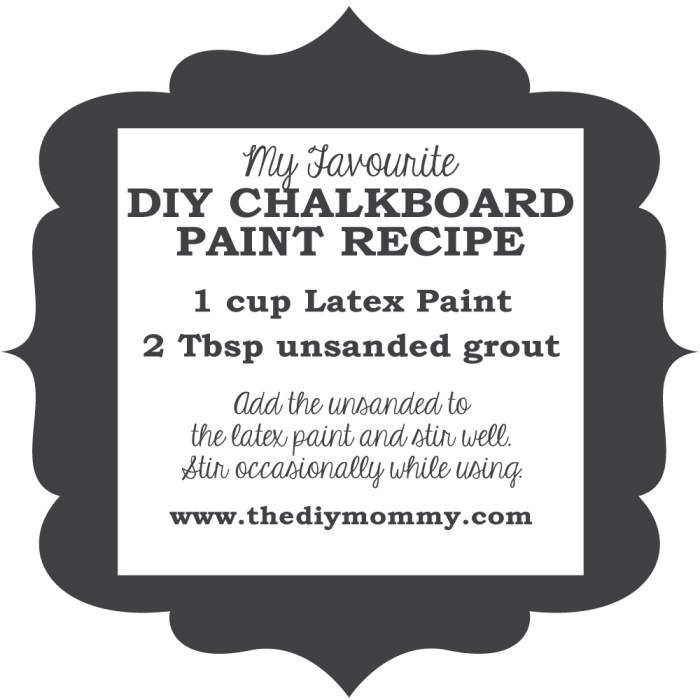
DIY Chalkboard Paint
DIY chalkboard paint is a cost-effective and fun way to transform any surface into a writable and erasable chalkboard. It’s a mixture of paint and a special bonding agent that allows chalk to adhere to the surface.
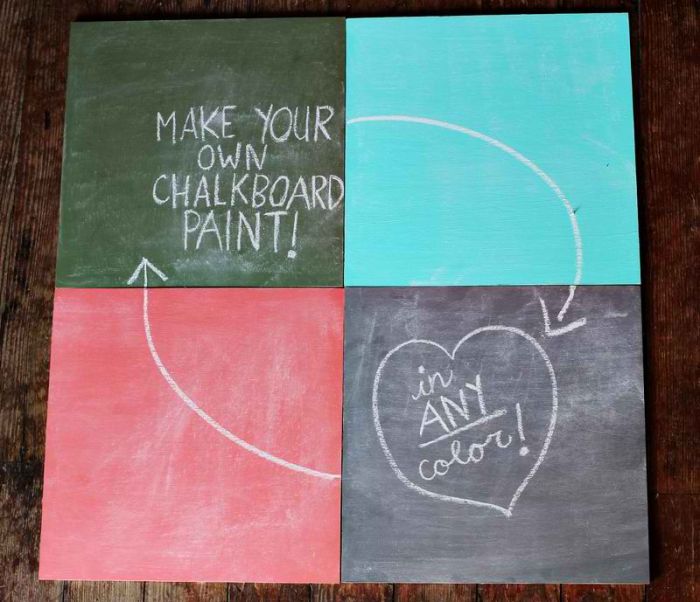
The main benefit of making your own chalkboard paint is the control over the final product. You can customize the color, texture, and even the level of chalkboard effect. You also save money compared to purchasing pre-made chalkboard paint.
History of Chalkboard Paint
Chalkboard paint has been around for a long time, evolving from its early forms. The earliest versions of chalkboard paint were often made with a simple mixture of black paint and a fine-grained material like sand or powdered slate. These early versions were not as durable or effective as modern chalkboard paints.
The development of acrylic paints and the addition of special bonding agents led to the creation of more durable and effective chalkboard paints. These paints were able to adhere to a wider variety of surfaces and provided a smoother, more consistent writing experience.
Ingredients and Materials for DIY Chalkboard Paint

Creating your own chalkboard paint is a fun and cost-effective project. You can customize the color and adjust the recipe based on your needs. To embark on this DIY journey, you’ll need a few essential ingredients and materials.
Essential Ingredients and Materials
The basic ingredients for DIY chalkboard paint are readily available. Here’s a list of what you’ll need:
- Acrylic Paint: The base for your chalkboard paint. Choose a color that suits your project. Black is the most common, but you can experiment with different colors.
- Plaster of Paris: This provides the chalkboard texture and helps the paint adhere to surfaces.
- Water: Used to mix the ingredients and achieve the desired consistency.
Base Paint for Chalkboard Paint
The type of paint you choose as the base will significantly impact the final product’s quality and durability. Here’s a breakdown of common base paint options:
- Acrylic Paint: This is the most popular choice due to its ease of use, quick drying time, and water-based formula. It’s available in various colors and finishes, offering versatility for different projects.
- Latex Paint: This option provides a more durable finish and is suitable for outdoor applications. However, it may take longer to dry compared to acrylic paint.
- Epoxy Paint: This high-performance paint is known for its exceptional durability and resistance to chemicals and abrasion. It’s ideal for high-traffic areas or projects that require a long-lasting finish.
Impact of Ingredients on Final Product Quality
The choice of ingredients directly influences the final product’s quality. Here’s a table comparing different ingredients and their impact on the final product’s quality:
| Ingredient | Impact on Quality |
|---|---|
| Acrylic Paint | Provides a smooth finish, dries quickly, and is easy to use. |
| Latex Paint | Offers a durable finish, suitable for outdoor applications. |
| Epoxy Paint | Provides exceptional durability and resistance to chemicals and abrasion. |
| Plaster of Paris | Creates the chalkboard texture and enhances adhesion. |
| Water | Adjusts the consistency of the paint, ensuring proper application. |
Step-by-Step Guide for Making DIY Chalkboard Paint
This step-by-step guide will help you create your own chalkboard paint using readily available materials. This homemade paint offers a fun and affordable way to add a chalkboard element to any surface.
Mixing the Ingredients
The first step is to combine the ingredients to create the paint base. This involves mixing the dry ingredients, followed by the addition of the liquid components.
- In a large bowl, combine the black pigment, plaster of Paris, and cornstarch. This combination provides the necessary color and texture for the chalkboard paint.
- Gradually add water to the dry mixture, stirring continuously to create a smooth, thick paste. The consistency should resemble that of thick yogurt. The water acts as a binder, helping to hold the ingredients together.
- Slowly add the vinegar to the mixture, stirring constantly. The vinegar helps to prevent the paint from cracking and ensures a smooth, even finish.
Achieving the Desired Consistency
The consistency of the paint is crucial for its application and performance. Adjusting the consistency is achieved by adding more water or dry ingredients.
The ideal consistency should be thick enough to coat the surface evenly but thin enough to flow smoothly.
- If the paint is too thick, add a small amount of water, stirring constantly, until the desired consistency is achieved.
- If the paint is too thin, add a small amount of dry ingredients, stirring constantly, until the desired consistency is achieved.
Applying the Paint
Once the paint has reached the desired consistency, it can be applied to the desired surface. Different surfaces may require specific techniques for optimal results.
- For smooth surfaces, such as wood or metal, apply the paint using a brush or roller. Ensure even coverage, avoiding any drips or runs.
- For rough surfaces, such as concrete or brick, apply the paint using a brush. Use firm strokes, working the paint into the crevices.
- After applying the paint, allow it to dry completely. This may take several hours depending on the thickness of the coat and the humidity.
Curing the Paint
Once the paint is dry, it needs to be cured to ensure optimal performance.
- After the paint has dried, apply a thin layer of chalk to the entire surface. This helps to seal the paint and prevent it from cracking.
- Wipe off the chalk with a damp cloth. The surface is now ready for use.
Tips and Tricks for Successful DIY Chalkboard Paint
Making your own chalkboard paint is a fun and rewarding project. However, achieving a smooth and even finish requires a bit of finesse. Here are some tips and tricks to help you create a flawless chalkboard surface.
Preparing the Surface
Proper surface preparation is crucial for a successful chalkboard paint project. A smooth and clean surface allows the paint to adhere properly and prevents uneven chalk application.
- Clean the surface: Remove any dirt, grease, or grime with soap and water. Allow the surface to dry completely before proceeding.
- Sand the surface: Lightly sand the surface with fine-grit sandpaper to create a slightly rough texture for better adhesion.
- Prime the surface: Apply a primer specifically designed for chalkboard paint. This creates a barrier between the surface and the chalkboard paint, enhancing its adhesion and durability.
Applying the Chalkboard Paint
Applying the chalkboard paint requires a steady hand and some patience. The key is to apply thin, even coats, allowing each coat to dry completely before applying the next.
- Use a good quality brush: A high-quality brush with soft bristles will help you achieve a smooth finish.
- Apply thin coats: Apply the paint in thin, even coats, avoiding thick globs. Thick coats can lead to uneven drying and cracking.
- Let each coat dry completely: Allow each coat to dry completely before applying the next. This prevents the paint from becoming cloudy or streaky.
Troubleshooting Common Problems
Even with careful preparation and application, you may encounter some problems with your DIY chalkboard paint. Here are some common issues and how to address them:
- Uneven finish: This can be caused by uneven application or inadequate surface preparation. To fix this, sand down the uneven areas and reapply the paint in thin, even coats.
- Chalk not sticking: This could be due to a lack of primer or insufficient drying time. Apply a primer specifically designed for chalkboard paint and allow the paint to dry completely before using chalk.
- Cracking or peeling: This often occurs when the paint is applied too thickly or the surface is not properly prepared. Sand down the affected areas and reapply the paint in thin coats.
Creating a Smooth and Even Finish
To achieve a professional-looking chalkboard surface, it is essential to apply the paint evenly and smoothly. Here are some techniques to help you achieve this:
- Use a roller: For larger surfaces, a roller can help you apply the paint quickly and evenly. Use a roller specifically designed for paint and ensure the nap is suitable for the surface.
- Use a brush: For smaller areas or intricate details, a brush is the preferred tool. Choose a high-quality brush with soft bristles and use gentle strokes to apply the paint.
- Use a paint sprayer: For large projects, a paint sprayer can provide a smooth and even finish. Ensure you use a paint sprayer specifically designed for latex paint and follow the manufacturer’s instructions carefully.
Creative Applications of DIY Chalkboard Paint
DIY chalkboard paint opens up a world of creative possibilities, transforming ordinary surfaces into interactive and personalized spaces. It’s not just for writing notes on the fridge anymore! This versatile paint allows you to unleash your inner artist, personalize your home, and add a touch of whimsy to any project.
Home Décor
Chalkboard paint is a fantastic way to add a touch of personality and functionality to your home décor. Here are some creative ideas:
- Accent Walls: Create a dramatic focal point in a room by painting an entire wall with chalkboard paint. This allows you to change the look of your space as often as you like, whether it’s a motivational quote, a family calendar, or a playful doodle.
- Kitchen Backsplashes: Turn your kitchen backsplash into a creative canvas for grocery lists, recipes, or even a whimsical mural. It’s a fun and practical way to keep track of everything while adding a touch of personality to your cooking space.
- Furniture Makeovers: Give old furniture a new lease on life with a coat of chalkboard paint. Transform a boring coffee table into a message center, or turn a dresser into a personalized art piece.
- Personalized Storage: Label storage containers, bins, and boxes with chalkboard paint for easy identification. This is especially useful for organizing craft supplies, tools, or kitchen items.
Crafts and Projects
Chalkboard paint’s versatility extends beyond home décor, making it a perfect tool for a variety of craft projects. Here are some examples:
- Personalized Gifts: Create unique and thoughtful gifts by adding a chalkboard element. Imagine a picture frame with a chalkboard border for personalized messages, or a wooden box with a chalkboard top for a special inscription.
- Interactive Artwork: Turn a canvas into an interactive piece of art by painting it with chalkboard paint. Invite friends and family to contribute their thoughts, doodles, or messages.
- Customizable Signage: Create eye-catching signage for events, parties, or businesses using chalkboard paint. It’s a cost-effective and versatile way to display information or promotions.
- Playful Decor: Add a touch of fun to your home with chalkboard painted accessories. Decorate picture frames, planters, or even lampshades with chalkboard paint for a personalized touch.
Table of Creative Applications
| Application | Description | Image |
|---|---|---|
| Accent Wall | A chalkboard wall adds a dramatic focal point to any room, allowing for personalized messages, art, or a calendar. | [Imagine a wall painted with chalkboard paint, showcasing a motivational quote, a doodle, and a family calendar.] |
| Kitchen Backsplash | Turn your kitchen backsplash into a creative canvas for grocery lists, recipes, or whimsical art. | [Imagine a kitchen backsplash painted with chalkboard paint, featuring a grocery list, a handwritten recipe, and a doodle of a chef.] |
| Furniture Makeover | Transform old furniture with chalkboard paint, turning a coffee table into a message center or a dresser into a personalized art piece. | [Imagine a vintage coffee table painted with chalkboard paint, showcasing messages, doodles, and a family photo.] |
| Personalized Storage | Label storage containers, bins, and boxes with chalkboard paint for easy identification. | [Imagine a set of storage containers with chalkboard labels, clearly identifying their contents, such as “Snacks,” “Tools,” and “Craft Supplies.”] |
| Personalized Gifts | Create unique gifts by adding a chalkboard element, such as a picture frame with a chalkboard border for personalized messages. | [Imagine a picture frame with a chalkboard border, showcasing a personalized message and a photo.] |
| Interactive Artwork | Turn a canvas into an interactive piece of art by painting it with chalkboard paint, inviting others to contribute. | [Imagine a canvas painted with chalkboard paint, featuring a collaborative doodle, messages, and artwork from various contributors.] |
| Customizable Signage | Create eye-catching signage for events, parties, or businesses using chalkboard paint. | [Imagine a chalkboard sign for a bakery, showcasing the day’s specials, prices, and a welcoming message.] |
| Playful Decor | Add a touch of fun to your home with chalkboard painted accessories, such as picture frames or planters. | [Imagine a set of picture frames with chalkboard borders, each showcasing a different doodle, message, or quote.] |
DIY Chalkboard Paint for Different Surfaces

DIY chalkboard paint can be applied to various surfaces, offering a creative and personalized touch to your home decor and projects. However, the application process and surface preparation vary depending on the material. Here’s a guide to applying chalkboard paint to different surfaces:
Wood
Wood is a common surface for chalkboard paint, as it readily accepts the paint.
- Sanding: Before applying chalkboard paint, sand the wood surface with fine-grit sandpaper to create a smooth and even texture. This helps the paint adhere better and prevents uneven application.
- Priming: Apply a primer specifically designed for wood surfaces. This helps seal the wood and provides a consistent base for the chalkboard paint.
- Application: Apply two thin coats of chalkboard paint, allowing each coat to dry completely before applying the next. Use a roller or brush, ensuring even coverage.
- Curing: After the final coat dries, allow the chalkboard paint to cure for at least 24 hours before using it. This ensures proper adhesion and prevents chalk from smudging.
Metal
Metal surfaces, like those found on appliances or furniture, can be transformed into chalkboards with proper preparation.
- Cleaning: Thoroughly clean the metal surface with a degreaser to remove any grease or oil. This ensures the paint adheres properly.
- Sanding: Lightly sand the metal surface with fine-grit sandpaper to create a slightly rough texture, promoting better adhesion.
- Priming: Apply a primer specifically designed for metal surfaces. This helps protect the metal from rust and provides a smooth surface for the chalkboard paint.
- Application: Apply two thin coats of chalkboard paint, allowing each coat to dry completely before applying the next. Use a roller or brush, ensuring even coverage.
- Curing: After the final coat dries, allow the chalkboard paint to cure for at least 24 hours before using it. This ensures proper adhesion and prevents chalk from smudging.
Glass
Glass surfaces, like windows or mirrors, can be transformed into unique chalkboards with careful application.
- Cleaning: Thoroughly clean the glass surface with a glass cleaner and a microfiber cloth to remove any dust or grime.
- Priming: Apply a primer specifically designed for glass surfaces. This helps the chalkboard paint adhere to the smooth glass surface.
- Application: Apply two thin coats of chalkboard paint, allowing each coat to dry completely before applying the next. Use a brush, ensuring even coverage. Avoid using a roller as it can leave streaks on glass.
- Curing: After the final coat dries, allow the chalkboard paint to cure for at least 24 hours before using it. This ensures proper adhesion and prevents chalk from smudging.
Other Surfaces
Chalkboard paint can be applied to various other surfaces, such as:
- Plastic: Clean the plastic surface with soap and water. Apply a primer designed for plastic, then follow the same application steps as for other surfaces.
- Ceramic: Clean the ceramic surface with soap and water. Apply a primer designed for ceramic, then follow the same application steps as for other surfaces.
- Concrete: Clean the concrete surface with a damp cloth and allow it to dry completely. Apply a primer specifically designed for concrete, then follow the same application steps as for other surfaces.
Maintaining and Cleaning DIY Chalkboard Paint
Your DIY chalkboard paint is ready to go, but how do you keep it looking its best and ensure it stays functional? Proper maintenance and cleaning are key to extending the life of your chalkboard surface.
Just like any other painted surface, your chalkboard needs a little TLC to keep it looking its best. Regular cleaning is essential for removing dust, dirt, and chalk residue that can accumulate over time. This will also prevent the chalk from smearing or leaving behind ghosting, which is a faint Artikel of previous markings.
Erasing Chalk Markings and Preventing Ghosting
Properly erasing chalk markings is crucial for preventing ghosting and ensuring a clean slate for your next masterpiece.
DIY chalkboard paint is a fantastic way to add a touch of personality and functionality to your space. Whether you’re creating a fun message board in the kitchen or a unique accent wall in your living room, the possibilities are endless. For more inspiration, check out these decoration room ideas DIY projects that can help you transform your home.
And don’t forget, chalkboard paint is a great way to personalize your DIY projects, adding a touch of whimsy and creativity to any room.
- Use a soft cloth or eraser: Avoid using abrasive materials like sponges or paper towels, as these can scratch the surface and damage the chalkboard paint.
- Apply gentle pressure: Erasing with too much force can also damage the paint. Instead, use light, even pressure to remove the chalk markings.
- Clean regularly: Regularly wiping down the chalkboard with a damp cloth will help prevent the buildup of chalk dust and minimize ghosting.
- Try a damp cloth: For stubborn markings or ghosting, dampen a soft cloth with water and gently wipe the surface. Avoid soaking the chalkboard, as this can damage the paint.
Preserving the Durability and Longevity of Chalkboard Paint
To ensure your DIY chalkboard paint stays vibrant and functional for years to come, consider these tips:
- Apply a sealant: A sealant can help protect the chalkboard paint from wear and tear, making it more durable and easier to clean. You can use a clear acrylic sealant specifically designed for chalkboards or a general-purpose sealant.
- Avoid harsh cleaners: Avoid using abrasive cleaners or chemicals on your chalkboard surface, as these can damage the paint and make it less effective.
- Store chalk properly: Chalk should be stored in a cool, dry place to prevent it from becoming brittle or dusty. This will help maintain its quality and prevent it from leaving behind unwanted residue on your chalkboard.
Safety Precautions and Considerations: Diy Chalkboard Paint
While DIY chalkboard paint is a fun and easy project, it’s important to prioritize safety when working with the ingredients. This section will Artikel key precautions and considerations to ensure a safe and enjoyable crafting experience.
Handling Ingredients
Before starting your DIY chalkboard paint project, it’s crucial to understand the potential hazards associated with the ingredients.
- Plaster of Paris: Plaster of Paris can irritate the skin and eyes. Avoid direct contact and wear gloves and eye protection when handling it.
- Black Pigment: Black pigment powders can be dusty and irritating to the respiratory system. Wear a mask to prevent inhalation and work in a well-ventilated area.
- Water: While water is generally safe, it’s essential to use clean water and avoid contact with open wounds or cuts.
Ventilation
Proper ventilation is essential when working with any DIY project, especially when using powders or pigments.
- Open Windows and Doors: Open windows and doors to allow fresh air to circulate.
- Use a Fan: If possible, use a fan to further improve ventilation.
- Work Outdoors: Consider working outdoors if possible to maximize fresh air exposure.
Potential Risks and Minimization
- Skin Irritation: Wear gloves to minimize contact with the ingredients.
- Eye Irritation: Wear eye protection, such as goggles or safety glasses.
- Respiratory Irritation: Wear a mask to prevent inhaling dust particles.
- Fire Hazard: Keep flammable materials away from the work area and avoid using open flames.
Exploring Alternative DIY Chalkboard Paint Recipes

While the basic DIY chalkboard paint recipe using black paint and plaster of Paris is a classic, many alternative recipes exist, each with its own set of advantages and disadvantages. These variations often incorporate different ingredients and techniques to achieve specific properties, such as improved durability, smoother finish, or enhanced chalk adherence.
Comparing Different DIY Chalkboard Paint Recipes
Exploring various DIY chalkboard paint recipes can lead to finding the perfect solution for your specific needs. Each recipe uses a unique combination of ingredients, resulting in variations in texture, durability, and chalk adherence. Here’s a comparison of popular recipes, highlighting their key ingredients and characteristics:
| Recipe | Key Ingredients | Pros | Cons |
|---|---|---|---|
| Basic Recipe | Black acrylic paint, Plaster of Paris | Simple, readily available ingredients | May be less durable, prone to cracking |
| Acrylic Paint and Joint Compound | Black acrylic paint, Joint compound | Smoother finish, more durable | Requires longer drying time |
| Black Paint and Black Sand | Black acrylic paint, Black sand | Enhanced chalk adherence, textured finish | May be more difficult to apply |
| Black Paint and Graphite Powder | Black acrylic paint, Graphite powder | Darker, more vibrant black, improved chalk adherence | Graphite powder can be messy |
DIY chalkboard paint opens up a world of creative possibilities. From personalized messages to artistic expressions, this versatile paint allows you to transform any surface into a blank canvas. By following the steps Artikeld in this guide, you can create a high-quality chalkboard paint that will enhance your projects and inspire your creativity.

