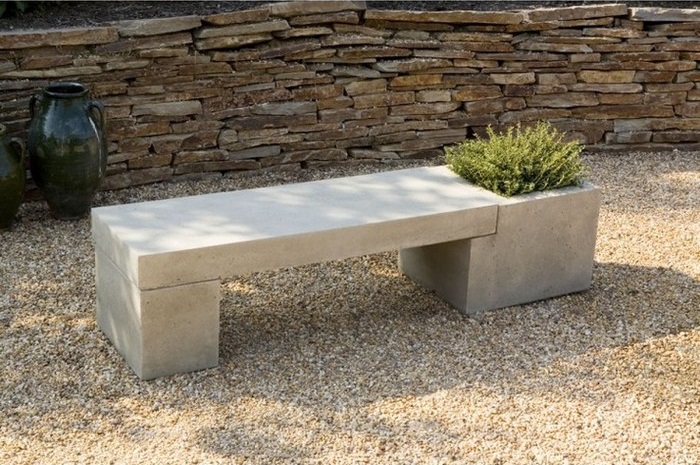
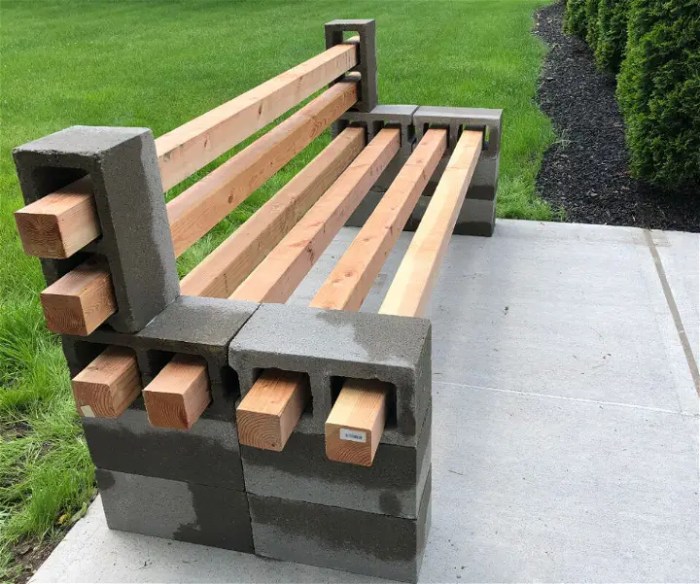
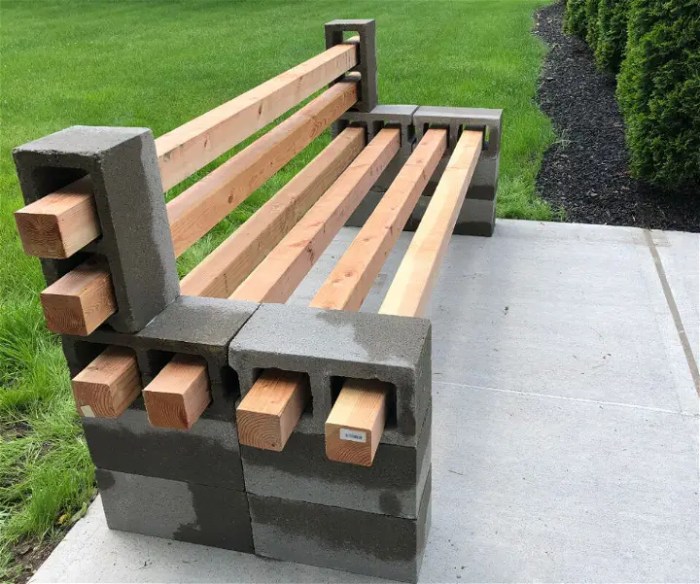
DIY concrete benches are a popular and appealing choice for homeowners looking to add a touch of durability and style to their outdoor spaces. Building your own concrete bench offers numerous benefits, including affordability, customization options, and the satisfaction of creating something unique and lasting. Imagine a cozy corner in your garden, a welcoming patio, or a stylish entryway – all enhanced by a handcrafted concrete bench that perfectly complements your vision. This guide will walk you through the process, from selecting materials and designing your formwork to mixing the concrete and achieving a stunning finish.
Whether you’re a seasoned DIYer or a curious beginner, building a concrete bench is a rewarding project that allows you to unleash your creativity and create a piece of furniture that truly reflects your personal style. Let’s embark on this journey together, exploring the materials, techniques, and design inspiration needed to transform your outdoor space with a DIY concrete bench that will stand the test of time.
Formwork Design and Construction
Formwork is the temporary structure that holds concrete in place until it hardens. Proper formwork design is crucial for achieving the desired shape, size, and strength of your concrete bench. It ensures the concrete flows correctly and prevents it from cracking or warping.
Formwork Techniques
Formwork techniques vary depending on the complexity of the design and the materials available. Here are some common methods:
- Plywood Formwork: Plywood is a versatile material that can be cut and shaped easily. It is relatively inexpensive and can be reused for multiple projects. Plywood formwork is ideal for simple designs with straight lines and curves.
- Lumber Formwork: Lumber, such as 2x4s or 2x6s, is another common material for formwork construction. It is strong and durable, making it suitable for complex designs with intricate shapes. Lumber can be used to create intricate details, such as curved edges or decorative elements.
- Pre-made Molds: Pre-made molds are available for specific shapes and sizes. These molds are typically made of plastic or fiberglass and are easy to assemble and disassemble. Pre-made molds are ideal for creating uniform shapes and reducing construction time.
Constructing Plywood Formwork
Here’s a step-by-step guide for constructing plywood formwork for a simple rectangular bench:
- Measure and Cut Plywood: Measure the desired dimensions of your bench and cut the plywood sheets accordingly. You will need two pieces for the top and bottom of the bench, and two pieces for the sides.
- Assemble the Formwork: Join the plywood pieces using screws or nails to create a rectangular frame. Ensure the corners are square and the sides are parallel.
- Add Bracing: Add bracing to the formwork for stability. You can use 2x4s or other lumber to create cross-braces or diagonal braces.
- Secure the Formwork: Secure the formwork to a level surface or foundation using stakes or clamps. Ensure the formwork is stable and won’t move during the concrete pouring process.
Tip: Use a level to ensure the formwork is level and square. This will help create a smooth and even bench surface.
Design Variations and Ideas

Beyond the basic rectangular shape, concrete benches offer a wide array of design possibilities. You can tailor your bench to your personal style and the specific needs of your outdoor space.
Shapes and Sizes
The shape and size of your bench determine its functionality and visual impact. Here are some design ideas:
- Curved Benches: Curved benches provide a more inviting and comfortable seating experience, especially for larger groups. They can be designed as a single sweeping curve or incorporate multiple curves for a more dynamic look.
- L-Shaped Benches: L-shaped benches are ideal for creating a cozy seating area in a corner. They can also be used to define a space or create a visual barrier.
- Circular Benches: Circular benches are perfect for creating a sense of community and encouraging conversation. They can be used in a variety of settings, from parks to patios.
- Bench with Backrest: A backrest provides additional comfort and support, making the bench more inviting for extended periods. You can create a simple backrest by extending the sides of the bench or by adding a separate backrest element.
Decorative Elements
Adding decorative elements to your concrete bench can enhance its aesthetic appeal and personalize its design.
- Textured Surfaces: You can create unique textures by using different aggregates or by adding patterns to the formwork. For example, you can use smooth river rocks, colorful pebbles, or even broken glass to create a mosaic-like effect.
- Inlays: Inlays are decorative elements that are embedded into the concrete surface. They can be made from a variety of materials, including wood, metal, glass, or even recycled materials.
- Carvings: You can carve designs or patterns into the concrete surface using a chisel or other tools. This can create a more rustic and traditional look.
- Painted Designs: Once the concrete has cured, you can paint the surface with your desired colors and designs. This is a great way to personalize your bench and make it a unique statement piece.
Molds and Templates
Molds and templates are essential tools for creating intricate designs and patterns in concrete.
- Molds: Molds are used to create the shape of the concrete bench. They can be made from a variety of materials, including wood, plastic, or metal. You can find pre-made molds online or create your own from custom designs.
- Templates: Templates are used to create patterns or designs on the surface of the concrete. They can be made from cardboard, plywood, or even metal. Templates can be used to create simple geometric patterns or more complex designs, such as floral motifs or abstract shapes.
Safety Considerations: Diy Concrete Bench

Working with concrete requires careful attention to safety to prevent injuries and accidents. It’s crucial to understand the hazards associated with concrete and take necessary precautions to ensure a safe working environment.
Personal Protective Equipment
Wearing appropriate personal protective equipment (PPE) is essential when handling concrete. Concrete dust, chemicals, and heavy materials can pose risks to your health and safety. Here are some key items of PPE:
- Safety Glasses: Protect your eyes from flying debris, concrete dust, and chemical splashes.
- Dust Mask: Prevent inhalation of concrete dust, which can irritate the lungs and cause respiratory problems.
- Gloves: Protect your hands from chemical burns, irritation, and rough surfaces.
- Work Boots: Provide sturdy support and protection from falling objects and sharp materials.
- Long Pants and Sleeves: Protect your skin from dust, chemicals, and potential spills.
Safe Handling of Heavy Materials
Concrete is heavy, and lifting and moving it incorrectly can lead to serious injuries. It’s important to use proper lifting techniques and mechanical assistance when necessary:
- Use Lifting Aids: Utilize wheelbarrows, dollies, or hoists to move heavy concrete bags or pre-mixed concrete.
- Proper Lifting Technique: Bend your knees and keep your back straight when lifting. Use your legs, not your back, to do the lifting.
- Get Help: If you’re lifting a heavy object, get assistance from another person to avoid strain or injury.
Safe Mixing and Pouring Techniques
Mixing and pouring concrete correctly is crucial for safety and to ensure the concrete sets properly. Improper techniques can lead to spills, uneven surfaces, and potential injuries:
- Follow Mixing Instructions: Carefully read and follow the manufacturer’s instructions for mixing the concrete. Use the correct amount of water and mix thoroughly to ensure a consistent consistency.
- Wear Protective Gear: Wear gloves and a dust mask when mixing concrete to protect your hands and lungs from dust and chemicals.
- Control Pouring: Pour concrete slowly and evenly into the formwork. Avoid spilling concrete, as it can be difficult to clean up and can create safety hazards.
- Secure the Formwork: Ensure the formwork is securely braced and supported before pouring concrete. This will prevent the formwork from collapsing and causing injuries.
Handling Hazardous Materials
Concrete dust and chemicals can be hazardous to your health. It’s essential to take precautions to minimize exposure:
- Dust Control: Use a dust mask and wet the concrete during mixing and pouring to minimize dust generation.
- Chemical Handling: Wear gloves and protective clothing when handling concrete chemicals, such as accelerators or retarders. Store these chemicals in a safe, well-ventilated area, away from children and pets.
- Cleanup: Clean up spills promptly and dispose of concrete waste properly. Concrete dust can be a health hazard, so it’s important to clean up thoroughly.
Tips and Tricks for Success
Creating a concrete bench is a rewarding DIY project, and with a few helpful tips and tricks, you can achieve professional-looking results. These tips address common mistakes and provide solutions for troubleshooting potential problems, ultimately enhancing the durability and longevity of your concrete bench.
Minimizing Air Bubbles
Air bubbles trapped within the concrete can weaken the structure and create an uneven surface. To minimize air bubbles, ensure proper mixing of the concrete. Use a drill mixer with a paddle attachment for thorough blending. Avoid over-mixing, as this can introduce excess air. Another effective technique is to vibrate the formwork after pouring the concrete. This process helps to release trapped air and compact the concrete for a denser, stronger result.
Preventing Cracks
Concrete is susceptible to cracking, particularly during the curing process. To prevent cracks, it is essential to maintain consistent moisture levels in the concrete. This can be achieved by covering the bench with plastic sheeting or damp burlap sacks for at least three days. Additionally, avoid placing the bench in direct sunlight or extreme temperatures during the initial curing period.
Achieving a Smooth Finish, Diy concrete bench
A smooth finish adds to the aesthetic appeal of the bench. After pouring the concrete, use a trowel to smooth the surface. Work in small sections to ensure even distribution. For a truly polished look, consider applying a concrete sealer after the concrete has fully cured. A sealer not only enhances the appearance but also protects the surface from staining and weathering.
Ensuring Proper Drainage
Concrete is porous, and if water is allowed to pool on the surface, it can lead to damage over time. To ensure proper drainage, consider incorporating a slight slope in the design of the bench. Alternatively, you can create drainage holes at the base of the bench to allow water to escape. These simple steps can help to extend the life of your concrete bench.
Using Form Release Agent
A form release agent is essential to prevent the concrete from sticking to the formwork. Apply a generous coat of form release agent to all surfaces of the formwork before pouring the concrete. This will allow you to easily remove the formwork once the concrete has cured, ensuring a clean and professional-looking finish.
Creating a DIY concrete bench is a rewarding experience that combines creativity, practicality, and a touch of DIY magic. From the initial planning stages to the final finishing touches, each step brings you closer to realizing your vision for a unique and functional piece of outdoor furniture. With careful planning, attention to detail, and a touch of patience, you can create a stunning concrete bench that will enhance your outdoor space and become a cherished part of your home for years to come. So gather your tools, unleash your creativity, and let the journey of building your own DIY concrete bench begin!
Creating a DIY concrete bench is a fun and rewarding project. It’s all about getting your hands dirty and letting your creativity flow. While you’re working on your bench, you might find yourself wanting to spruce up your workspace with a personalized touch. That’s where a DIY makeup bag comes in handy! Check out this DIY makeup bag tutorial for inspiration, and then get back to your concrete masterpiece.
Once your bench is finished, you’ll have a stylish and functional piece that you can enjoy for years to come.

