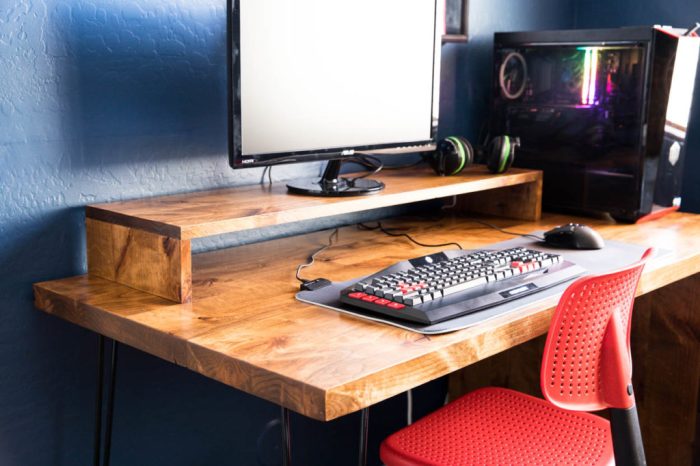
DIY Desktop: Build Your Own Computer is a comprehensive guide for anyone interested in creating a custom desktop computer. Whether you’re a tech enthusiast seeking ultimate control over your hardware or simply looking to save money, building your own desktop offers a rewarding experience. This guide will walk you through every step, from planning and component selection to assembly, troubleshooting, and even customizing your desktop’s aesthetics.
From understanding the fundamental components to navigating the intricacies of choosing the right hardware for your needs, this guide empowers you to make informed decisions and assemble a desktop that meets your specific requirements. We’ll delve into the advantages of building your own desktop, covering topics such as cost savings, customization, and the satisfaction of crafting a powerful machine from scratch. Whether you’re a beginner or a seasoned PC builder, this guide will equip you with the knowledge and confidence to embark on your DIY desktop journey.
Choosing the Right Components
Building a desktop computer requires selecting the right components, each playing a crucial role in the overall performance and functionality. Choosing the right components is essential to ensure that the system meets your specific needs and budget.
CPU (Central Processing Unit)
The CPU is the brain of your computer, responsible for processing all the instructions and data. It is a key factor in determining overall system performance.
- Core Count and Threads: More cores and threads mean the CPU can handle more tasks simultaneously, leading to better multitasking performance. For example, a CPU with 8 cores and 16 threads can handle 16 tasks simultaneously, improving performance in demanding applications like video editing or gaming.
- Clock Speed: Measured in GHz, clock speed determines how fast the CPU can process instructions. A higher clock speed generally results in faster performance, but it also consumes more power and generates more heat.
- Cache: Cache is a small, fast memory that stores frequently used data, reducing the time it takes to access information. Larger cache sizes can improve performance, especially in applications that require frequent data access.
When choosing a CPU, consider your intended use. For casual browsing and office work, a dual-core CPU with a moderate clock speed might suffice. For gaming or video editing, a CPU with more cores, threads, and a higher clock speed is recommended. Budget also plays a role, as higher-end CPUs can be significantly more expensive.
GPU (Graphics Processing Unit)
The GPU is responsible for rendering graphics and handling complex visual tasks. It is crucial for gamers, video editors, and anyone working with graphics-intensive applications.
- Memory (VRAM): The amount of VRAM determines the GPU’s ability to store and process textures and other graphical data. A higher VRAM capacity is essential for high-resolution gaming and demanding graphics applications.
- Core Count and Clock Speed: Similar to CPUs, GPUs also have cores and clock speeds, which influence their processing power. Higher core counts and clock speeds translate to better performance in graphics-intensive tasks.
- Architecture: Different GPUs use different architectures, which affect their performance and efficiency. For example, Nvidia’s RTX series GPUs are known for their ray tracing capabilities, while AMD’s Radeon RX series GPUs offer competitive performance at a lower price point.
For casual gaming or basic graphics tasks, an integrated GPU might suffice. For high-end gaming or professional graphics work, a dedicated GPU with a higher VRAM capacity and core count is necessary.
RAM (Random Access Memory)
RAM is the computer’s short-term memory, used to store data that the CPU is actively working with. It is essential for smooth system performance and multitasking.
- Capacity: The amount of RAM determines how much data the computer can hold in its active memory. More RAM allows the system to run more applications simultaneously without slowing down.
- Speed: RAM speed, measured in MHz, determines how quickly data can be accessed. Faster RAM can improve system responsiveness and performance.
For basic tasks, 8GB of RAM might be sufficient. For demanding applications like gaming or video editing, 16GB or more is recommended.
Storage
Storage devices store all the data on your computer, including operating systems, applications, and files.
- HDD (Hard Disk Drive): HDDs are traditional storage devices that use spinning platters to store data. They are generally cheaper than SSDs but offer slower speeds.
- SSD (Solid State Drive): SSDs use flash memory to store data, providing much faster read and write speeds compared to HDDs. They are more expensive but offer a significant performance boost, especially for boot times and application loading.
For the operating system and frequently used applications, an SSD is highly recommended for faster performance. HDDs can be used for storing large files or backups.
Motherboard, Diy desktop
The motherboard is the central component of a desktop computer, connecting all other components. It determines the overall compatibility and upgradeability of the system.
- Socket Type: The motherboard must have a compatible socket type for the chosen CPU. Different CPU manufacturers use different socket types.
- Chipset: The chipset determines the motherboard’s features and capabilities, including the number of supported PCIe slots, RAM slots, and USB ports.
- Form Factor: The motherboard’s form factor determines its size and compatibility with different cases. Common form factors include ATX, Micro-ATX, and Mini-ITX.
Choose a motherboard that supports the desired CPU, has enough expansion slots for future upgrades, and fits the chosen case.
Troubleshooting and Maintenance: Diy Desktop

Building a desktop computer is an exciting endeavor, but like any complex system, issues can arise. Understanding common problems and how to troubleshoot them is crucial for a smooth experience. This section will guide you through identifying and resolving potential issues, as well as maintaining your system for optimal performance.
Troubleshooting Techniques
Troubleshooting a DIY desktop build often involves a systematic approach to isolate the problem. This might involve examining components, software, and connections.
- Component Issues: If a component, like a RAM stick or a graphics card, is faulty, it can cause various problems. You can try replacing the suspect component with a known working one to confirm if it’s the source of the issue.
- Software Issues: Software conflicts or driver issues can also lead to problems. Reinstalling operating systems or updating drivers can often resolve these issues.
- Connection Issues: Loose or faulty connections can cause problems like a lack of display or internet connectivity. Ensure all cables are securely connected and check for any signs of damage.
Maintenance Tips
Regular maintenance is essential for keeping your desktop running smoothly and efficiently.
- Dust Removal: Dust accumulation can hinder airflow and cause overheating. Regularly clean the inside of your computer case with compressed air to remove dust.
- Thermal Paste: Thermal paste helps transfer heat from the CPU and GPU to the heatsink. It’s recommended to reapply thermal paste every few years to ensure optimal heat dissipation.
- Software Updates: Keeping your operating system and software up to date ensures the latest security patches and bug fixes are applied.
- Disk Cleanup: Regularly clean your hard drive to remove unnecessary files and optimize performance.
DIY Desktop Aesthetics

Aesthetics are a vital part of any DIY desktop build, as it’s a reflection of your personality and taste. Beyond the functionality, your desktop can be a statement piece that showcases your style. This section explores various ways to personalize your desktop’s appearance, including custom case design, lighting, and cooling solutions.
Custom Case Design
Designing a unique desktop case allows you to create a truly personal and visually appealing build. There are many approaches you can take, from subtle modifications to full-blown custom designs.
- Case Modding: Start with a standard case and customize it by adding your own flair. This can involve painting, adding custom panels, or incorporating unique materials like wood or acrylic.
- 3D Printing: 3D printing allows for complete creative freedom in case design. You can create custom panels, brackets, and even entire cases from scratch.
- Theme-Based Design: Choose a theme and design your case around it. Popular themes include gaming, sci-fi, steampunk, or even a specific character or franchise.
Installing Custom Lighting
Adding custom lighting to your desktop can significantly enhance its aesthetics. The options are vast, ranging from subtle ambient lighting to vibrant RGB configurations.
- LED Strips: These are affordable and easy to install, allowing you to add lighting to various areas within your case.
- RGB Fans: Many fans come with RGB lighting, offering a customizable and vibrant way to illuminate your case’s interior.
- Lighting Controllers: These controllers allow you to manage and synchronize the lighting effects of multiple components, creating complex and dynamic light shows.
Installing Custom Cooling Solutions
While primarily functional, custom cooling solutions can also contribute to your desktop’s aesthetics. By choosing visually appealing components, you can create a stunning and efficient cooling system.
- Water Cooling: Water cooling offers excellent cooling performance and a visually striking aesthetic. It involves using a water loop to circulate coolant through the CPU and GPU.
- Custom Radiator and Fan Configurations: By strategically placing radiators and fans, you can create a visually appealing and efficient cooling setup.
- Custom Cooling Blocks: Water cooling blocks can be customized with different colors, designs, and even lighting effects, adding a unique touch to your build.
DIY Desktop for Content Creation
Building a desktop specifically for content creation can unlock your creative potential and empower you to tackle complex projects with ease. Whether you’re a video editor, graphic designer, or a 3D artist, a custom-built desktop can be a game-changer.
Choosing the Right Components
The key to a powerful content creation machine lies in selecting components that work harmoniously to deliver exceptional performance.
- Processor (CPU): The CPU is the brain of your computer, responsible for processing all your creative tasks. For content creation, you’ll want a processor with multiple cores and high clock speeds to handle demanding software like Adobe Premiere Pro or Blender. Look for CPUs from Intel’s Core i7 or i9 series or AMD’s Ryzen 7 or 9 series.
- Graphics Card (GPU): The GPU is crucial for rendering graphics, video, and 3D models. A powerful GPU can significantly accelerate your workflow, especially for video editing and 3D rendering. Opt for a dedicated graphics card from NVIDIA’s GeForce RTX series or AMD’s Radeon RX series. The specific model you choose will depend on your budget and the intensity of your creative tasks.
- RAM: RAM, or Random Access Memory, is your computer’s short-term memory. It stores data that your applications need to access quickly. For content creation, you’ll need a generous amount of RAM to handle large files and multiple programs running simultaneously. Aim for at least 16GB, but 32GB or more is recommended for demanding workflows.
- Storage: Storage is where your projects, software, and operating system reside. You’ll need fast storage for quick loading times and smooth performance. A combination of SSDs (Solid State Drives) and HDDs (Hard Disk Drives) is a common approach. SSDs are faster but more expensive, while HDDs offer more storage space at a lower cost. Consider using an SSD for your operating system and frequently used applications, while using an HDD for larger files and backups.
Managing Large Files
Content creation often involves working with large files, such as high-resolution images, 4K videos, and 3D models. Managing these files efficiently is essential for smooth workflow.
- External Storage: Invest in external hard drives or network-attached storage (NAS) devices to store your projects and backups. This will free up space on your primary drive and provide an extra layer of protection for your valuable data.
- Cloud Storage: Cloud storage services like Google Drive, Dropbox, or OneDrive offer a convenient way to store and access your files from anywhere. Some cloud storage providers offer specialized plans for creative professionals with large file storage needs.
- File Compression: Compressing large files can save storage space and reduce transfer times. Tools like WinRAR or 7-Zip can compress files without compromising quality.
Optimizing Software Performance
- Software Updates: Keep your software updated to benefit from performance enhancements and bug fixes. Regular updates often include optimizations for specific hardware configurations, improving compatibility and stability.
- Background Processes: Limit unnecessary background processes running on your computer. These can consume resources and slow down your creative applications. Close any programs you’re not actively using and consider using a task manager to identify and manage resource-intensive processes.
- System Settings: Explore your operating system’s settings to find options for optimizing performance. For example, you can adjust the amount of RAM dedicated to specific applications or disable unnecessary visual effects.
Building a DIY desktop is an empowering journey that allows you to tailor a computer to your exact needs and preferences. From the initial planning stages to the satisfaction of powering up your creation, the process is both challenging and rewarding. By understanding the fundamentals of components, carefully selecting the right parts, and following the assembly steps with precision, you can confidently create a custom desktop that surpasses your expectations. Remember, the journey of building a DIY desktop is just the beginning. As your needs evolve, you can upgrade and customize your machine, ensuring it stays ahead of the curve and reflects your ever-changing computing demands. So, embrace the world of DIY desktops and embark on a journey of technical mastery and personal satisfaction.
Building a DIY desktop can be a rewarding project, allowing you to customize your workspace to your exact needs. While researching components, you might stumble upon information about atorvastatin tablet uses , which is a medication for high cholesterol, completely unrelated to desktop building. However, it highlights the importance of verifying information from reliable sources before implementing any changes to your computer system.

