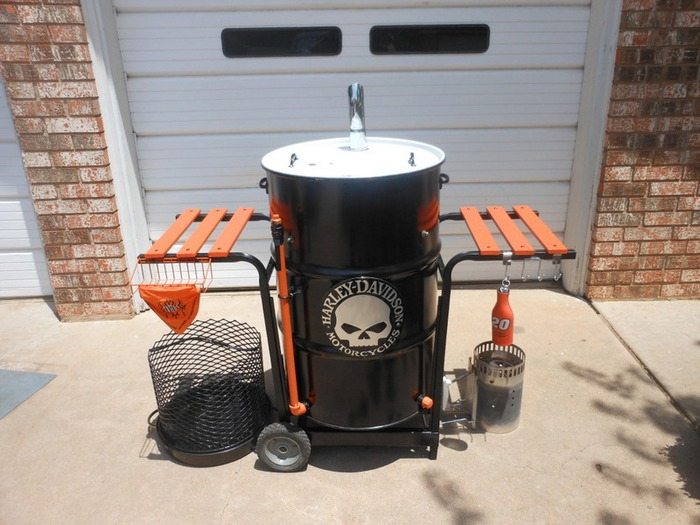
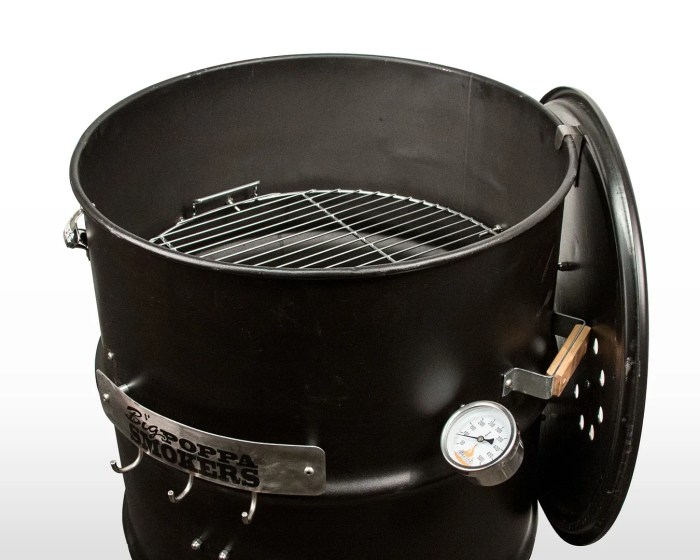
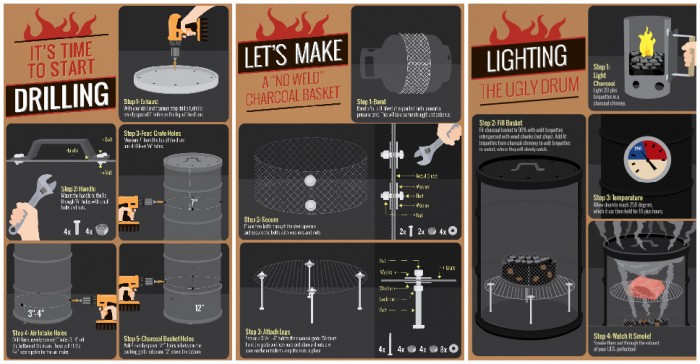
DIY drum smokers offer a unique and affordable way to elevate your grilling and smoking game. This versatile cooking apparatus, crafted from repurposed drums, allows you to create delicious smoked meats, fish, and vegetables with a personal touch.
From selecting the right drum to designing the firebox and cooking chamber, this guide will walk you through every step of building your own DIY drum smoker. We’ll cover essential materials, construction techniques, and helpful tips for maximizing your smoking experience.
Choosing the Right Drum

The heart of your DIY drum smoker is the drum itself. Choosing the right one is crucial for both functionality and safety. You’ll want to consider size, material, and condition to ensure a successful and enjoyable smoking experience.
Drum Size and Material
The size of the drum will determine the amount of food you can smoke at once. Smaller drums (55-gallon) are ideal for personal use, while larger drums (100-gallon) are suitable for larger groups or catering. Material is another important factor. Steel drums are affordable and readily available, but they can rust if not properly maintained. Stainless steel drums are more expensive but resist rust and are easier to clean.
- Steel drums: Affordable and readily available. They offer good heat retention and are suitable for most smoking applications. However, they are prone to rusting, especially if exposed to moisture. Regular cleaning and maintenance are essential.
- Stainless steel drums: More expensive than steel drums but offer superior rust resistance and are easier to clean. They are also more durable and can withstand higher temperatures, making them a good choice for more demanding smoking applications.
Drum Condition and Modifications
Before you purchase a drum, it’s important to inspect its condition. Look for signs of rust, damage, or leaks. You’ll also want to consider any necessary modifications, such as adding a door or a water pan.
- Rust: If the drum has rust, it’s important to remove it before using it. You can do this by using a wire brush or sandpaper. If the rust is extensive, you may need to replace the drum.
- Damage: Any damage to the drum, such as dents or holes, could compromise its structural integrity. If you find any damage, it’s best to choose a different drum.
- Leaks: Leaks can cause problems with your smoking process and can also be a safety hazard. Inspect the drum carefully for any leaks before you start using it.
- Modifications: You may need to make some modifications to your drum, such as adding a door or a water pan. These modifications can help to improve the functionality and efficiency of your smoker.
Sourcing Drums
Drums are readily available from a variety of sources.
- Local businesses: Check with local businesses that use drums, such as auto shops, paint stores, and chemical suppliers. They may be willing to sell you a used drum for a reasonable price.
- Online marketplaces: Websites like eBay and Craigslist offer a wide selection of drums, both new and used. You can often find good deals on drums in these marketplaces.
Constructing the Cooking Chamber
The cooking chamber is the heart of your drum smoker, where the magic of smoking happens. This section will guide you through the design and construction of the cooking chamber, focusing on essential elements for efficient smoking.
Cooking Chamber Configurations
The design of your cooking chamber can significantly impact your smoking experience. Two common configurations are single-tier and multi-tier chambers.
- Single-tier: This configuration is the simplest and most common. It consists of a single chamber directly above the firebox, providing ample space for smoking. It’s ideal for smaller smoking sessions or those who prefer a single level of cooking space.
- Multi-tier: This configuration allows for more cooking space, offering multiple levels for different types of food. It’s perfect for larger gatherings or those who want to smoke a variety of items simultaneously.
Building the Cooking Chamber, Diy drum smoker
The construction of the cooking chamber involves a few key steps:
- Cutting the Drum: Measure and cut the drum to your desired height for the cooking chamber. This is usually about 2/3 of the drum’s total height, leaving room for the firebox below.
- Adding the Cooking Rack: Choose a sturdy metal grate or wire mesh to serve as your cooking rack. Position it inside the chamber, ensuring sufficient space for airflow and heat circulation.
- Creating the Door: Cut a door opening on the side of the chamber, large enough for accessing the food and managing the smoking process. Use hinges and a latch to secure the door.
- Insulating the Chamber: Proper insulation is crucial for heat retention and consistent smoking temperatures. Use high-temperature insulation materials like ceramic fiber blanket or refractory cement to line the chamber walls.
Importance of Insulation and Heat Retention
Insulation plays a critical role in maintaining a stable smoking temperature. Here’s why:
- Consistent Temperature: Insulation prevents heat loss from the cooking chamber, ensuring a consistent smoking temperature throughout the process. This results in evenly cooked food.
- Fuel Efficiency: With good insulation, your smoker will use less fuel to maintain the desired temperature, leading to cost savings and a more environmentally friendly experience.
- Reduced Smoking Time: A well-insulated chamber allows for faster heating and a more efficient smoking process, reducing the overall cooking time.
Cooking Techniques for Drum Smokers: Diy Drum Smoker

Drum smokers are incredibly versatile, allowing you to smoke, grill, and roast a wide variety of foods. They are particularly well-suited for smoking meats, but you can also use them to grill vegetables, fish, and even bake bread.
Smoking
Smoking is a slow cooking method that infuses food with a smoky flavor. It involves cooking food over low heat, typically between 225°F and 250°F, in an enclosed environment filled with smoke. The smoke is generated by burning wood chips or chunks, which add flavor and aroma to the food.
Smoking Times and Temperatures
The following table provides general smoking times and temperatures for popular smoked meats:
| Meat | Smoking Time | Smoking Temperature |
|---|---|---|
| Brisket | 10-14 hours | 225°F – 250°F |
| Pork Shoulder | 8-12 hours | 225°F – 250°F |
| Ribs | 4-6 hours | 225°F – 250°F |
| Chicken | 2-3 hours | 225°F – 250°F |
| Fish | 1-2 hours | 225°F – 250°F |
Choosing the Right Wood Chips
The type of wood chips you use will significantly impact the flavor of your smoked food. Here are some popular wood chips and their corresponding flavors:
- Hickory: Strong, smoky flavor, often used for pork, beef, and chicken.
- Mesquite: Earthy, slightly sweet flavor, well-suited for beef, lamb, and poultry.
- Apple: Mild, sweet flavor, ideal for poultry, pork, and fish.
- Cherry: Sweet, fruity flavor, perfect for pork, chicken, and fish.
- Oak: Robust, slightly sweet flavor, good for beef, lamb, and pork.
Grilling
Grilling is a faster cooking method that uses direct heat to sear and char food. It is typically done over high heat, around 400°F to 500°F, and is perfect for cooking steaks, burgers, hot dogs, and vegetables.
Grilling Tips
- Preheat your grill: Allow the grill to reach the desired temperature before adding food. This ensures even cooking and prevents sticking.
- Oil the grill grates: This will prevent food from sticking and create a nice sear.
- Avoid overcrowding the grill: Give food space to cook evenly. If you overcrowd the grill, the temperature will drop and the food will steam instead of grilling.
- Flip food only once: This will help create a nice sear and prevent the food from drying out.
Roasting
Roasting is a dry-heat cooking method that involves cooking food in an oven. It is typically done at moderate temperatures, between 325°F and 400°F, and is perfect for cooking whole chickens, turkeys, vegetables, and roasts.
Roasting Tips
- Preheat your oven: Allow the oven to reach the desired temperature before adding food.
- Season the food generously: Roasting enhances the flavors of the food, so don’t be afraid to use plenty of spices and herbs.
- Use a roasting pan: This will help to distribute heat evenly and prevent the food from sticking.
- Baste the food regularly: This will keep the food moist and flavorful.
Resources and Further Exploration

You’ve come a long way in your journey to build a DIY drum smoker! But the learning never stops. This section provides you with resources and communities to help you take your smoking skills to the next level.
Recommended Resources
- Books:
- The Complete Book of Barbecue by Steven Raichlen: This comprehensive guide covers everything from choosing the right smoker to mastering different cooking techniques. It offers a wide range of recipes and tips for achieving perfect barbecue results.
- Smoke & Spice by Cheryl and Bill Jamison: This book is a great resource for understanding the science of smoking and provides valuable insights into wood selection, temperature control, and creating flavorful smoke.
- The Barbecue Bible by Steven Raichlen: Another classic in the world of barbecue, this book delves into the history and traditions of barbecue, offering a diverse range of recipes and techniques.
- Websites:
- Smoking Meat: This website is a treasure trove of information about smoking meat, offering comprehensive guides on different smoking methods, recipes, and troubleshooting tips. It also includes a forum where you can connect with other enthusiasts.
- AmazingRibs.com: A highly respected resource for barbecue and grilling, AmazingRibs.com features detailed articles on smoking, grilling, and barbecuing techniques, as well as extensive reviews of various smokers and equipment.
- BBQ Pit Boys: This website provides a wide range of resources, including recipes, videos, and articles, focused on barbecue and smoking. They also offer a forum where you can ask questions and share your experiences.
- Videos:
- BBQ Pit Boys YouTube Channel: This channel features a vast library of videos on various aspects of barbecue and smoking, covering techniques, recipes, and product reviews. Their engaging style and practical tips make them a popular resource for enthusiasts.
- Traeger Grills YouTube Channel: Traeger Grills is a well-known manufacturer of pellet grills, and their YouTube channel offers a wealth of information on using their grills, including smoking techniques, recipes, and tips for achieving delicious results.
- Meat Church YouTube Channel: Meat Church is known for its flavorful rubs and sauces. Their YouTube channel features videos on grilling, smoking, and barbecue techniques, along with recipes and product demonstrations.
Joining Online Communities
Participating in online communities and forums dedicated to DIY drum smokers and barbecue offers numerous benefits. These platforms allow you to:
- Share your experiences and projects: Connecting with other enthusiasts allows you to share your successes, challenges, and unique approaches to building and using drum smokers.
- Learn from others: Tap into a wealth of knowledge and expertise from experienced smokers who are willing to share their tips, tricks, and recipes.
- Get advice and troubleshoot problems: When you encounter a problem or have a question, online communities provide a platform for seeking guidance and solutions from others who have likely faced similar situations.
- Find inspiration and motivation: Seeing the projects and successes of others can inspire you to push your own boundaries and explore new techniques and recipes.
Sharing Your Experiences
We encourage you to share your own DIY drum smoker projects and experiences with the community. Whether you’re a seasoned smoker or just starting out, your insights and knowledge can benefit others who are embarking on their own smoking journeys.
Building a DIY drum smoker is a rewarding project that combines creativity, resourcefulness, and a passion for delicious smoked food. With a little effort and ingenuity, you can craft a smoker that’s uniquely yours, allowing you to explore the world of smoking with endless possibilities.
Building a DIY drum smoker is a fun and rewarding project, especially if you’re a barbecue enthusiast. You can find plenty of online resources and tutorials to guide you through the process. If you’re looking for a way to relax and unwind after a long day of working on your smoker, you might consider exploring options like lunesta , a sleep aid that can help you get a restful night’s sleep.
With a good night’s rest, you’ll be ready to tackle your next DIY project, whether it’s finishing your smoker or taking on a new challenge.

