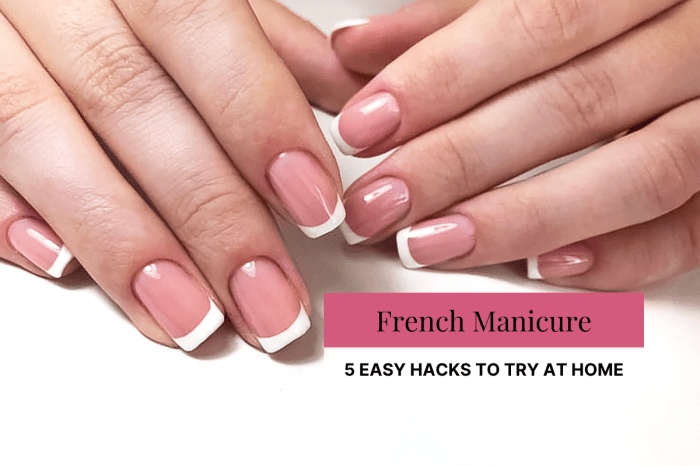
DIY French manicure hacks are the secret to achieving a salon-worthy look without leaving the comfort of your own home. Whether you’re a seasoned nail artist or a beginner, these simple tricks and techniques will help you create a classic French manicure that’s both chic and long-lasting.
From prepping your nails to applying the perfect white tip, this guide covers everything you need to know to master the art of the French manicure. We’ll delve into different techniques, explore color options, and offer tips for achieving a flawless finish that’s sure to turn heads.
Nail Preparation: Diy French Manicure Hacks

A flawless French manicure starts with perfectly prepped nails. Clean and dry nails are essential for the polish to adhere properly and last longer.
Shaping and Buffing
Before applying any polish, it’s crucial to shape and buff your nails for a smooth finish. This helps the polish to glide on evenly and prevents any bumps or ridges.
- Shape your nails: Use a nail file to shape your nails into your desired shape. Aim for a smooth, even edge.
- Buff your nails: Use a nail buffer to gently smooth out any ridges or imperfections on the nail surface. This will help create a smooth base for the polish.
Cuticle Care
Cuticle oil and a cuticle pusher are essential tools for proper nail preparation.
- Apply cuticle oil: Massage cuticle oil into your cuticles to soften and moisturize them. This will help prevent hangnails and make it easier to push back the cuticles.
- Push back your cuticles: Use a cuticle pusher to gently push back your cuticles. This will help create a clean canvas for your French manicure.
French Manicure Hacks for a Long-Lasting Finish

A long-lasting French manicure requires more than just a perfect white tip. You need to pay attention to the base and top coats, as well as some techniques to prevent chipping and smudging. Here are some helpful hacks to keep your French manicure looking fresh for days.
Applying Base and Top Coats
A good base coat creates a smooth surface for the polish to adhere to, preventing chipping and extending the life of your manicure. A top coat seals in the color and adds shine, protecting your nail art from damage.
- Apply a thin, even coat of base coat to each nail. Let it dry completely before applying the color.
- Use a quick-dry top coat for faster drying time. This helps prevent smudging and allows you to get back to your day quickly.
- Reapply a top coat every 2-3 days to maintain shine and durability. This helps to keep your French manicure looking fresh and prevents chipping.
Preventing Chipping and Smudging
Even with a good base and top coat, your French manicure can still chip or smudge if you’re not careful. Here are some tips to prevent this:
- Avoid using your nails as tools. This can put stress on the polish and cause it to chip.
- Be gentle when applying the polish. Don’t press too hard, as this can also cause chipping.
- Let each coat of polish dry completely before applying the next. This helps to prevent smudging and ensure a smooth, even finish.
- Use a nail strengthening treatment or oil to keep your nails hydrated. This can help to prevent chipping and make your manicure last longer.
Alternative French Manicure Designs

The classic French manicure is a timeless look, but there are plenty of ways to put a modern twist on it. Whether you’re looking for a subtle update or a bold statement, these alternative designs offer endless possibilities.
Ombre Tips
Ombre tips are a popular variation on the classic French manicure. They create a soft, gradient effect that can be customized with different colors and shades.
To create ombre tips, you’ll need:
- Two or more nail polishes in coordinating colors
- A makeup sponge
- A small bowl of water
- A nail polish remover
To create the ombre effect, dip the sponge into the darker color, then lightly dab it onto the tips of your nails. Repeat with the lighter color, blending the two shades together. If you make a mistake, you can clean up the edges with a cotton swab dipped in nail polish remover.
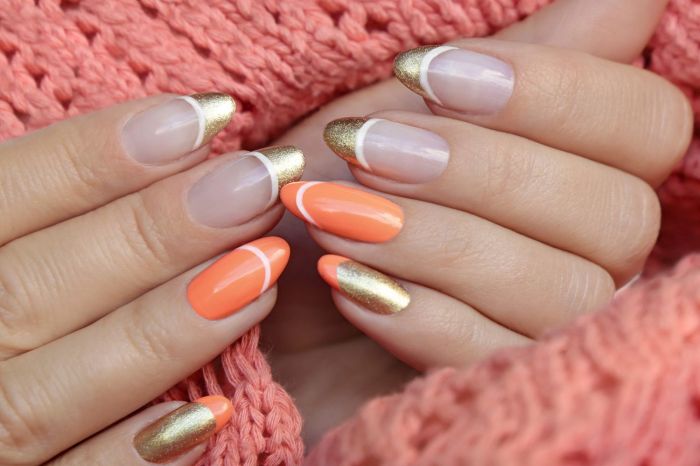
Glitter Tips
Glitter tips are a fun and festive way to add some sparkle to your French manicure. You can use any type of glitter, from fine shimmer to chunky flakes.
To create glitter tips, you’ll need:
- A base coat
- A white or nude nail polish
- Glitter polish or loose glitter
- A clear top coat
- A small brush or toothpick
Start by applying a base coat to your nails. Then, apply a white or nude nail polish to your entire nail. Once the polish is dry, use a small brush or toothpick to apply glitter polish or loose glitter to the tips of your nails. You can create a thin line of glitter or a thick, chunky design. Once the glitter is applied, seal it with a clear top coat.
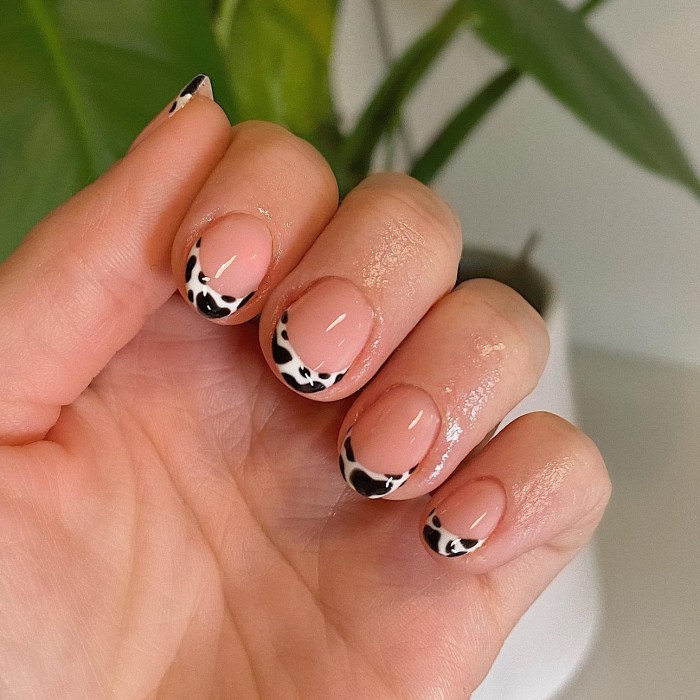
Geometric Designs
Geometric designs are a modern and trendy way to add some edge to your French manicure. You can create simple lines, triangles, or more intricate patterns.
To create geometric designs, you’ll need:
- A base coat
- A white or nude nail polish
- A thin nail polish brush
- A clear top coat
- A nail art tool (optional)
Start by applying a base coat to your nails. Then, apply a white or nude nail polish to your entire nail. Once the polish is dry, use a thin nail polish brush to create geometric designs on the tips of your nails. You can use a nail art tool to help you create precise lines and shapes. Once the designs are complete, seal them with a clear top coat.
Troubleshooting Common DIY French Manicure Mistakes
Even the most skilled nail artists can encounter mishaps when attempting a DIY French manicure. From uneven tips to smudging, these common mistakes can be frustrating. However, with a little practice and the right techniques, you can achieve a flawless finish at home.
Identifying and Correcting Uneven Tips
Uneven tips are a common problem when creating a French manicure. This can be due to shaky hands, improper application of the white polish, or using a nail guide that’s not properly aligned.
- Use a Steady Hand: Rest your elbow on a flat surface to stabilize your hand while applying the white polish. This will help you create smoother, more even lines.
- Practice Makes Perfect: Practice applying the white polish on a piece of paper or a spare nail before attempting your manicure. This will help you get a feel for the consistency of the polish and the pressure needed for a smooth application.
- Invest in Quality Nail Guides: Nail guides can be invaluable for achieving perfectly straight lines. Choose guides made of high-quality materials that are easy to apply and remove. Ensure the guides are properly aligned with the edge of your nail before applying the white polish.
- Clean Up Mistakes: If you notice any unevenness, use a small brush dipped in nail polish remover to clean up the edges. Be careful not to smudge the surrounding polish.
Preventing Smudging, Diy french manicure hacks
Smudging is another common problem, especially when applying multiple coats of polish. This happens when the polish hasn’t fully dried before being disturbed.
- Allow Time to Dry: Always allow each coat of polish to dry completely before applying the next. This may take longer than you think, so be patient and avoid touching your nails until they are fully dry.
- Use a Quick-Dry Top Coat: A quick-dry top coat can help speed up the drying process and prevent smudging. Apply a thin coat of top coat to seal in the polish and protect it from chips and scratches.
- Avoid Touching Your Nails: Once you’ve applied the polish, resist the urge to touch your nails until they are completely dry. This can smudge the polish and ruin your manicure.
Achieving a Flawless Finish
Here are some additional tips for achieving a flawless French manicure at home:
- Start with Clean Nails: Before applying any polish, clean your nails with a cotton ball soaked in nail polish remover. This will remove any dirt, oil, or debris that can interfere with the polish’s adhesion.
- Apply Thin Coats: It’s better to apply multiple thin coats of polish than one thick coat. This will help prevent the polish from becoming clumpy and uneven.
- Use a Base Coat: A base coat will protect your nails from staining and help the polish last longer. Apply a thin coat of base coat to your nails before applying the polish.
- Clean Up Edges: After applying the polish, use a cotton swab dipped in nail polish remover to clean up any excess polish around the edges of your nails. This will give your manicure a polished and professional look.
With a little practice and the right tools, you can create a stunning French manicure that rivals any salon professional. So, gather your favorite nail polish, embrace the tips and tricks Artikeld in this guide, and get ready to unleash your inner nail artist. From classic to trendy, the world of French manicure designs is your oyster!
DIY French manicures are a great way to add a touch of elegance to your look, but it’s important to be aware of the potential for mistakes. For example, if you’re not careful, you could end up with uneven lines or smudges. Just like with any other DIY project, it’s important to do your research and be aware of the potential risks.
For instance, some medications, such as salbutamol , can have side effects that could impact your nail health. However, with a little practice and patience, you can achieve a flawless French manicure at home.

